How to upgrade from Microsoft Teams Displays to Virtual Front Desk on Neat Frame


How to upgrade from Microsoft Teams Displays to Virtual Front Desk on Neat Frame
If your organization is moving on from Microsoft Teams Displays, Neat Frame can be a practical way to deploy Virtual Front Desk as a more flexible reception setup. This guide shows how to set up Neat Pulse, enroll your Neat Frame, and launch Virtual Front Desk on the device. It keeps the same core installation flow while helping you transition to a setup that supports front-desk workflows on dedicated reception hardware. The original setup requires creating a Neat Pulse account, enabling the Virtual Front Desk app, enrolling the device in Pulse, launching the app from App Hub, and connecting the station with a VFD connection code.
Why organizations are making this switch
Organizations using Microsoft Teams Displays for front-desk scenarios may now be reviewing alternatives that work on supported devices without tying the experience to one hardware path. Virtual Front Desk gives teams a way to continue running reception workflows while expanding into visitor handling, branded station actions, and multi-location deployment.
With Neat Frame, you can set up a dedicated reception station that supports Virtual Front Desk workflows in a polished device experience.
Before you begin
Before starting, make sure you have:
- A Neat Frame
- Access to Neat Pulse
- A Virtual Front Desk account
- A station connection code from your Virtual Front Desk dashboard
- The correct VFD region selected when connecting the station
Getting started with Neat Pulse, Neat Frame, and Virtual Front Desk
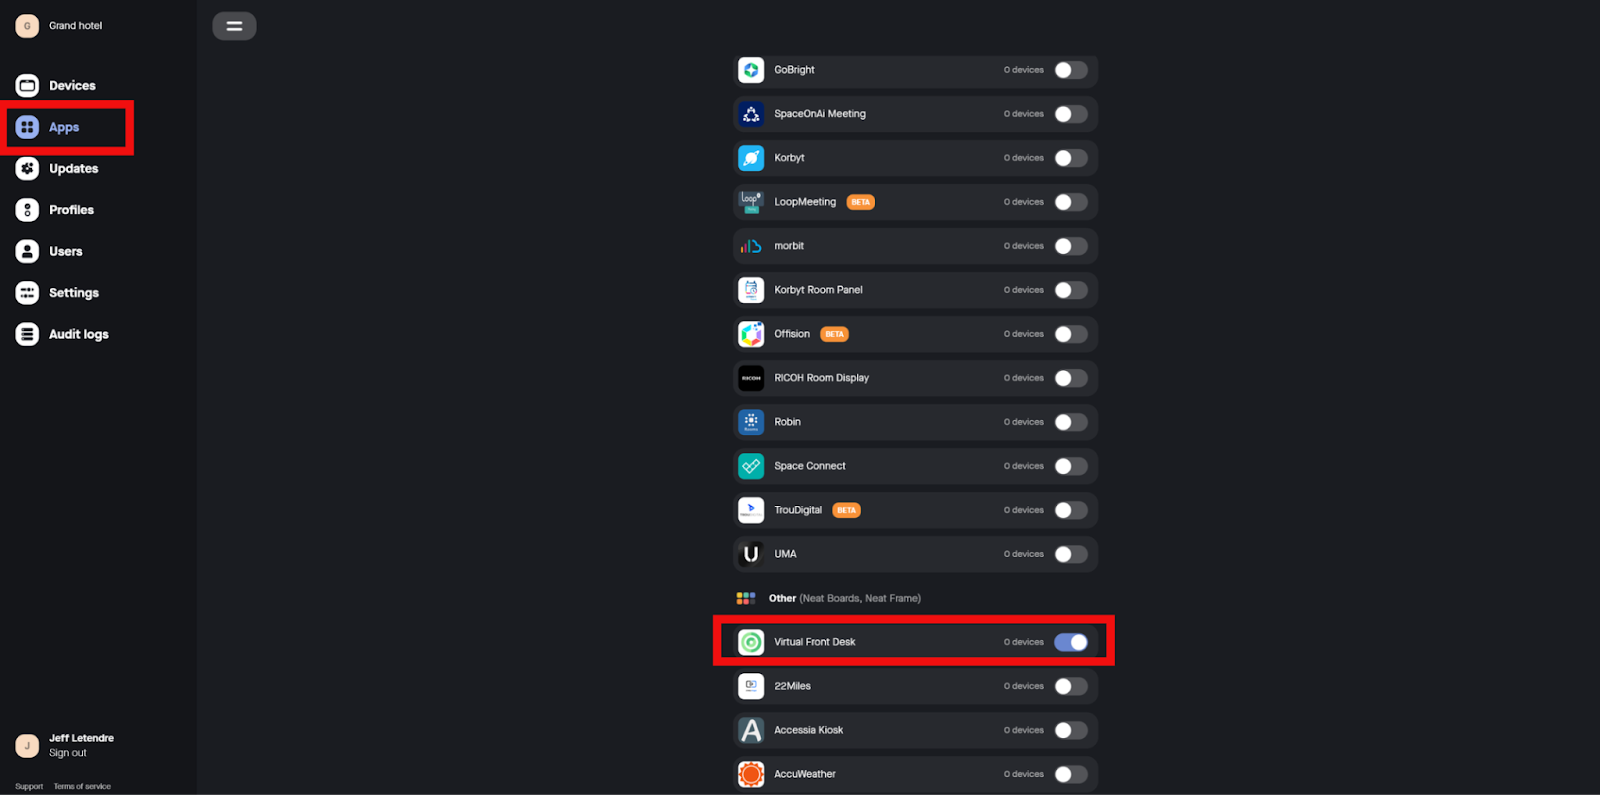
To use Virtual Front Desk on Neat Frame, you first need to create or access a Neat Pulse account and enable the Virtual Front Desk app from the Pulse Apps menu. The source article instructs users to go to Pulse, sign up, follow the prompts, and toggle on Virtual Front Desk in the Apps menu.
Step 1: Create or access your Neat Pulse account
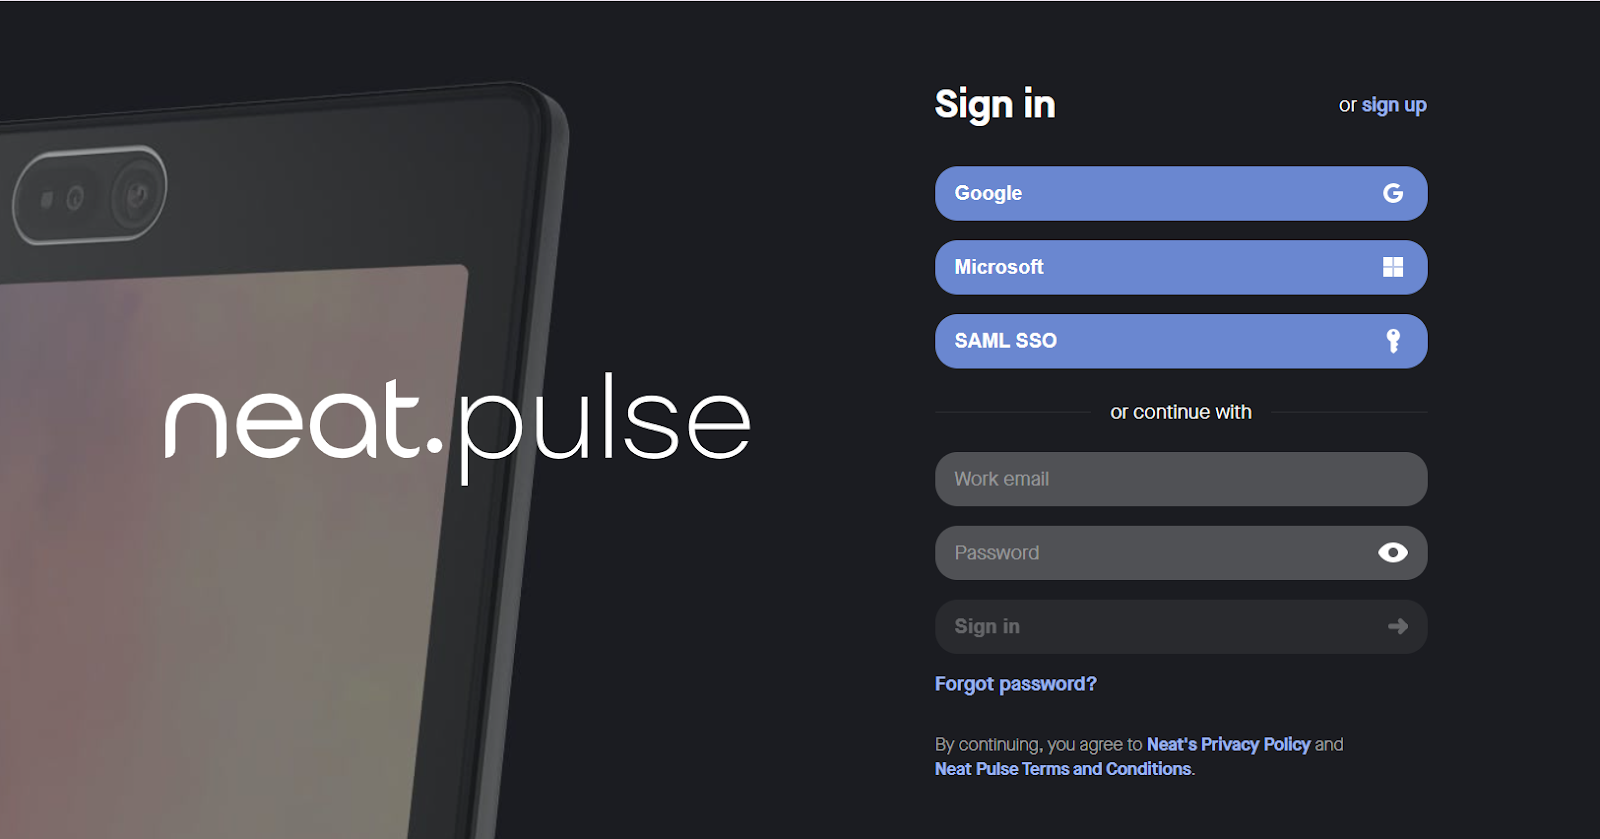
- Go to pulse.neat.no
- On the login page, select Sign up in the top-right corner
- Enter the company email address you want to use with your Neat Pulse account
- Follow the on-screen setup instructions
- If prompted, select the Free Starter plan
- Open the Apps menu in Pulse and toggle on Virtual Front Desk
If you are migrating from a Microsoft Teams Displays-based setup, this is the point where you begin shifting the reception device experience into the Virtual Front Desk workflow.
How to set up your Neat Frame
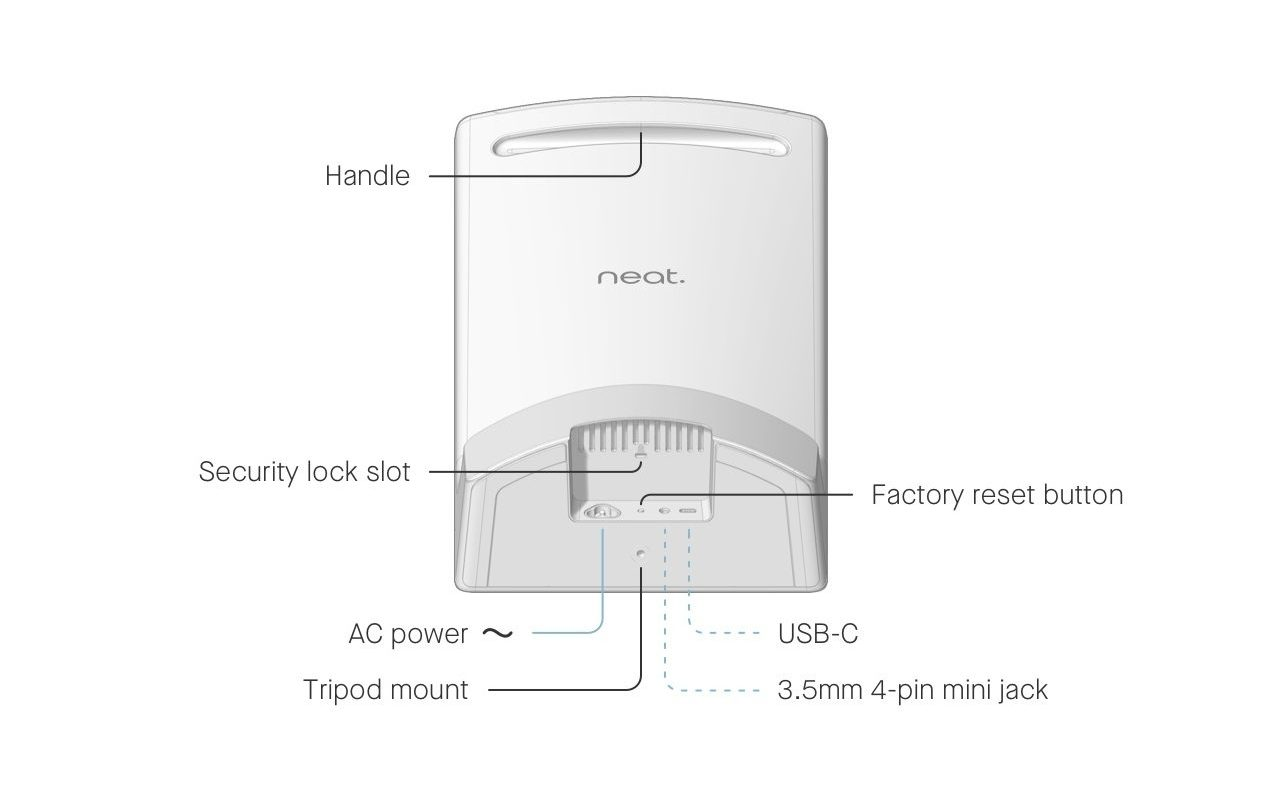
Step 2: Power up your Neat Frame
Connect your Neat Frame to AC power.
Step 3: Configure language, network, and time zone settings
When the Frame powers on, follow the on-screen prompts:
- Select your language and click Continue
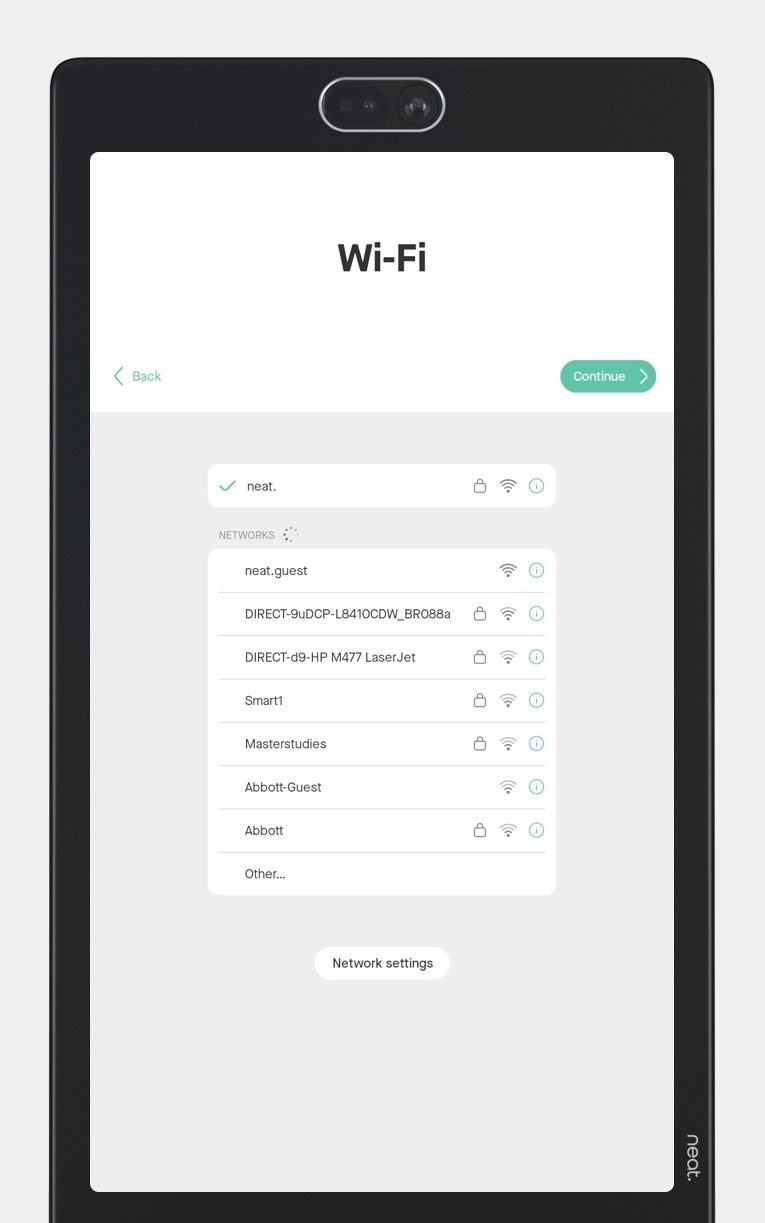
- Connect the Frame to Wi-Fi by choosing your preferred network and click Continue
- If prompted for the admin password when reconnecting to a network, use the last 6 digits of the serial number
- Select the correct time zone and click Continue
- Choose 24-hour clock format if needed and click Continue
If you prefer a wired setup, you can also use an Ethernet to USB-C adapter. These steps are part of the original setup flow before enrolling the device into Neat Pulse.
Step 4: Enroll the Frame in Neat Pulse
The next step is to enroll the device in Neat Pulse. This is required before the device can access Virtual Front Desk from Neat App Hub. The source article explicitly notes that you can only access Virtual Front Desk in Neat App Hub after enrollment.
- Go to pulse.neat.no and log in
- Open the named space where you want to add the device
- Click Generate Code
- Enter the generated code on the Neat Frame screen
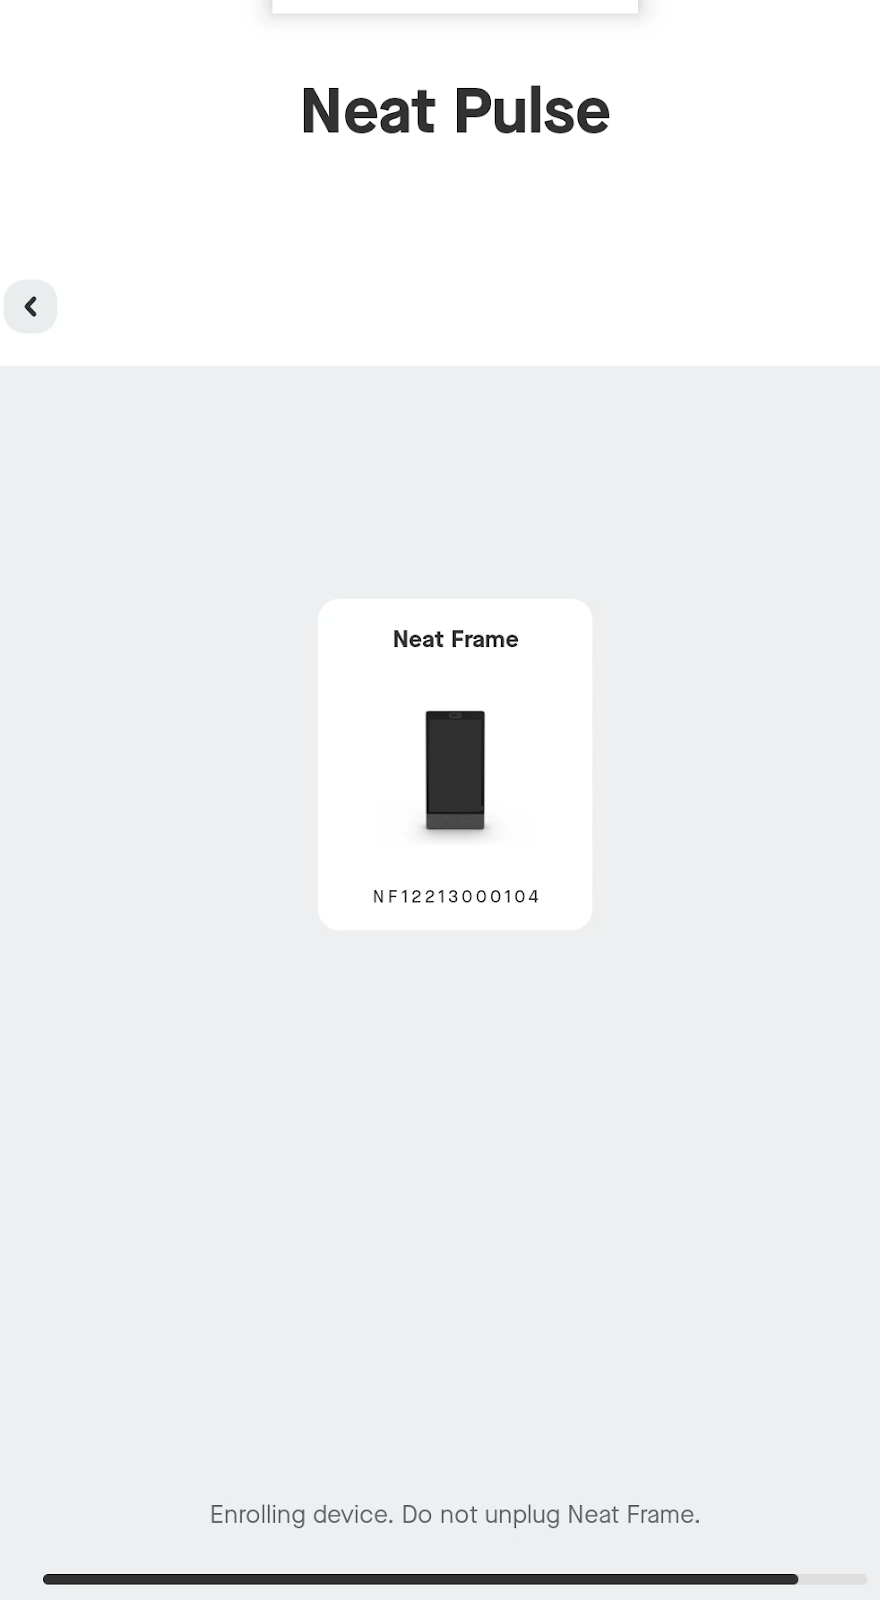
The screen will show progress while the device is being enrolled. Do not unplug the device during this process.
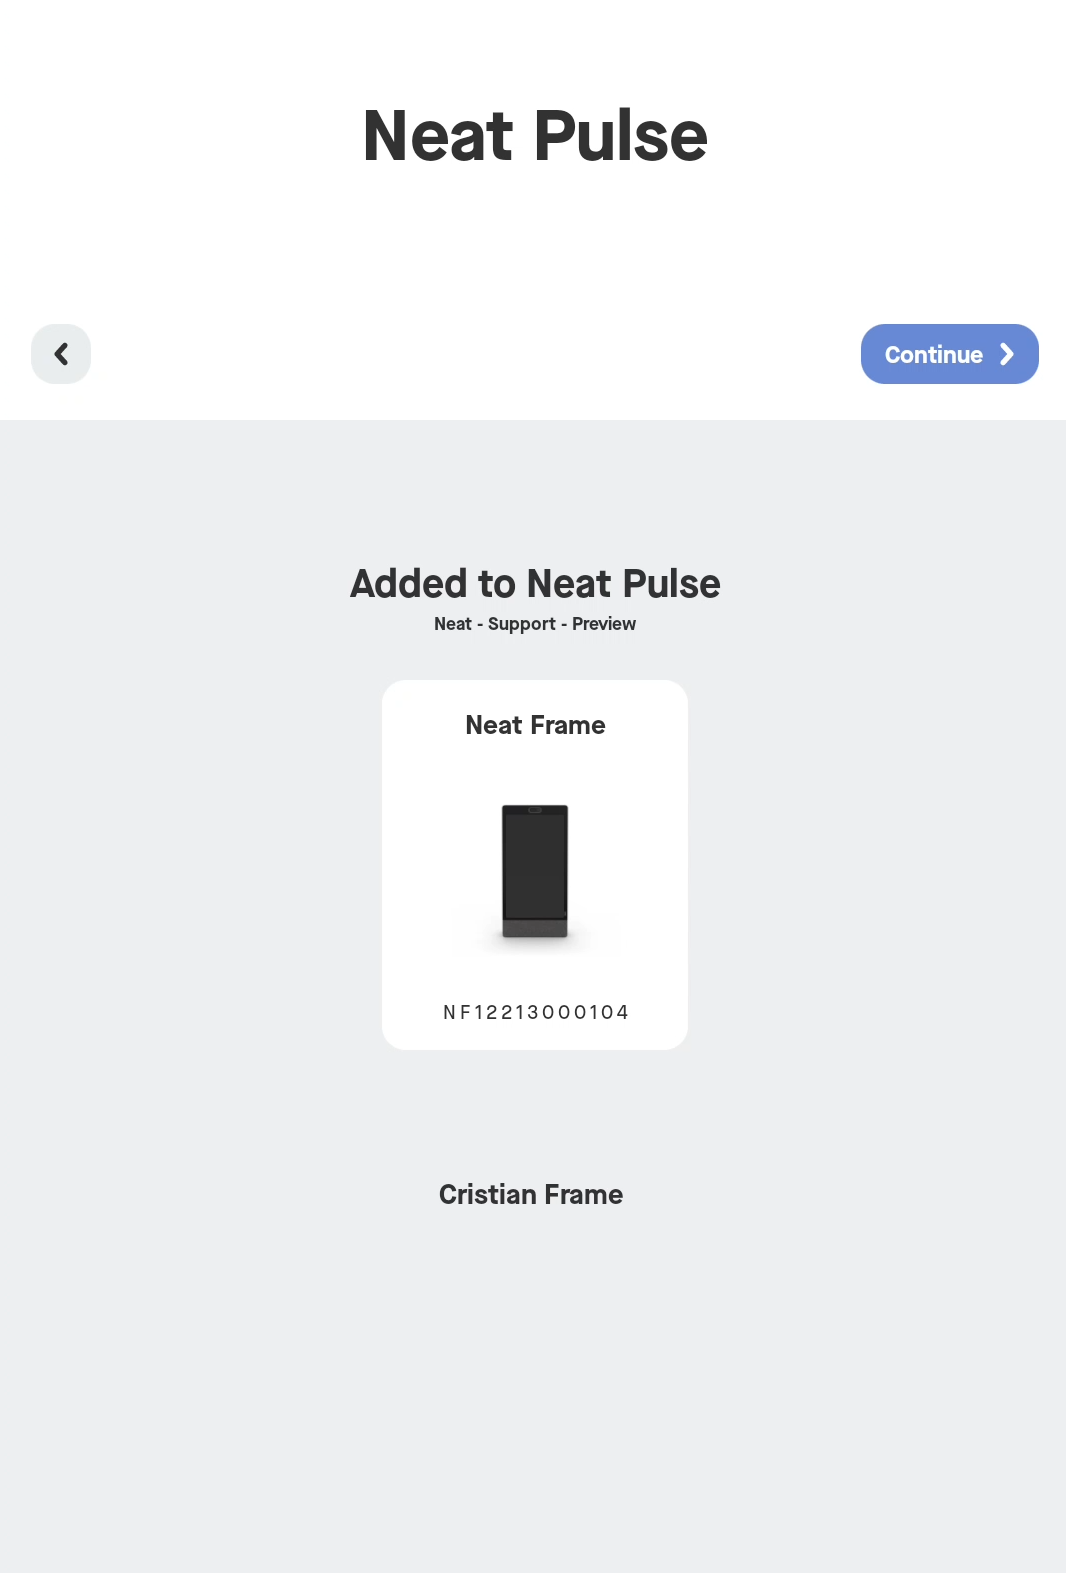
Once completed, the screen will confirm that the device has been added to Neat Pulse.

Step 5: Analytics and camera setup
After enrollment, continue through the standard Neat setup flow:
- Choose whether to enable or disable device analytics sharing
- Review the camera preview and click Looks good
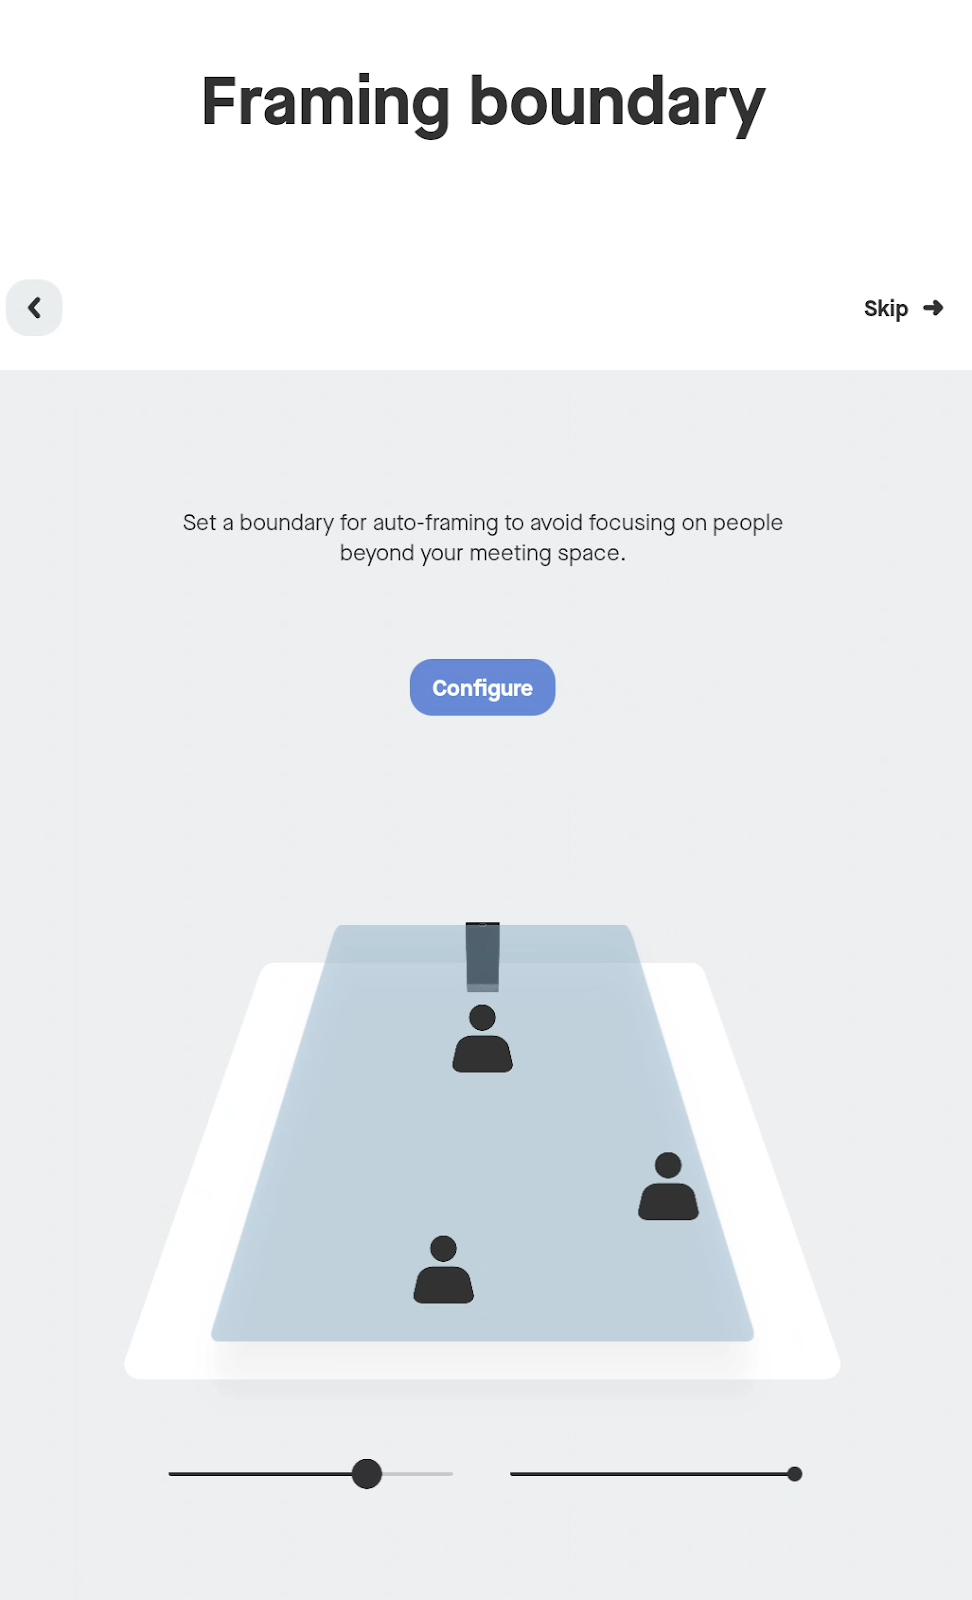
- Optionally set a framing boundary for auto-framing
These settings do not change the Virtual Front Desk installation, but they help finalize the device experience before launch.
Step 6: Choose “Other App” and install Virtual Front Desk
Next, tap the App Hub icon labeled Other, then click Continue. Virtual Front Desk will install from there. The original guide also notes that if “Other” is not visible, you may need to factory reset the Frame and confirm that Virtual Front Desk is enabled in Pulse before retrying.
Important notes:
- Do not unplug the device while installation is in progress
- You will only see Other if the device has already been enrolled in Neat Pulse
- If “Other” does not appear, confirm the VFD app is enabled in Pulse and retry the setup process
Once the install completes, a prompt will confirm the device is ready. Click Launch.
For teams migrating from Microsoft Teams Displays, this is the step where the device begins operating as a Virtual Front Desk station rather than a Teams Displays front-desk endpoint.

Step 7: Enter your Virtual Front Desk station connection code
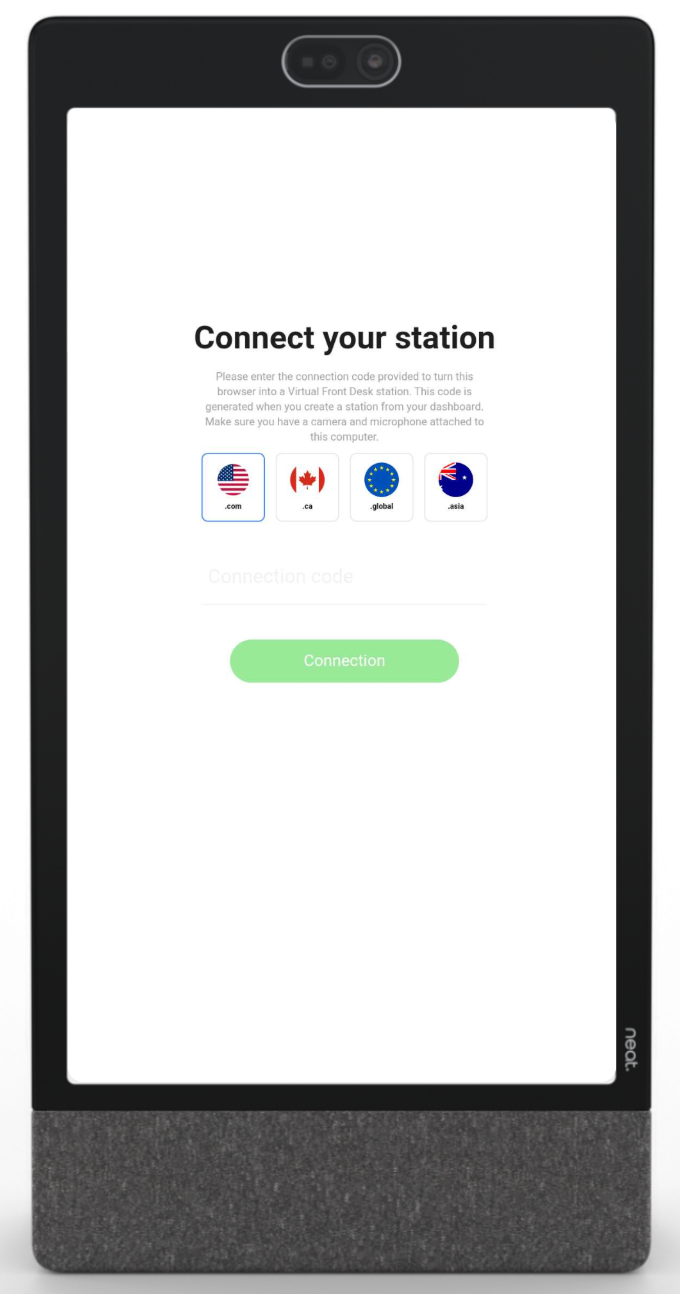
When Virtual Front Desk launches, it will ask for your station connection code.
To find it:
- Sign in to your Virtual Front Desk dashboard
- Copy the connection code for the station you want to use
- Enter the code on the Neat Frame
- Make sure you select the same region as your Virtual Front Desk account
The source article points users to the VFD dashboard and notes that the station must already be created before entering the code.
After entering the code, your station will load.
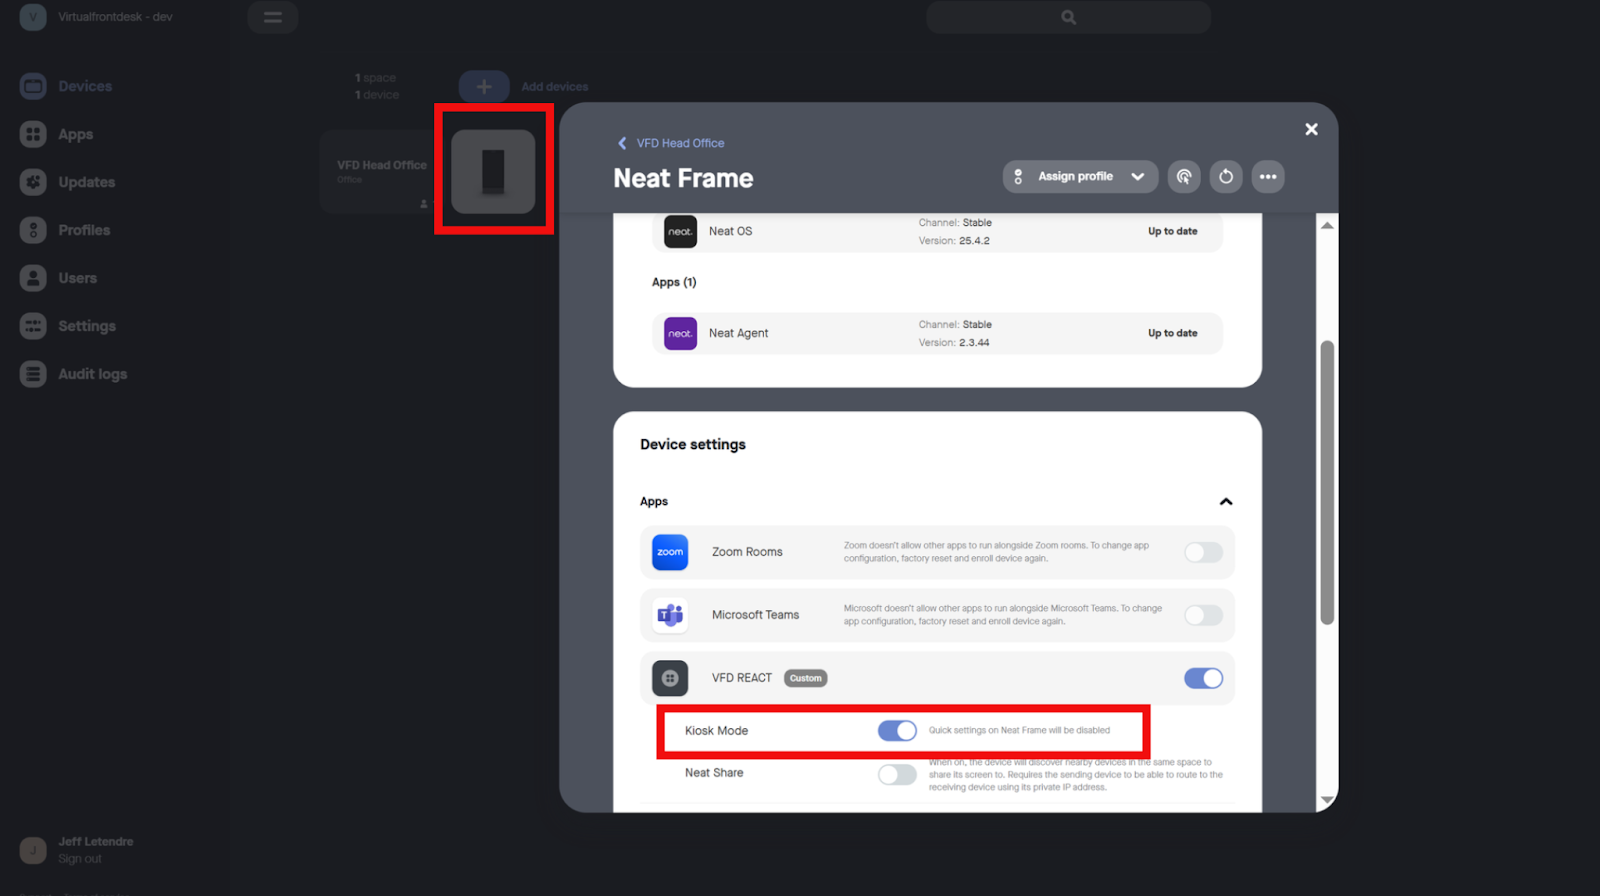
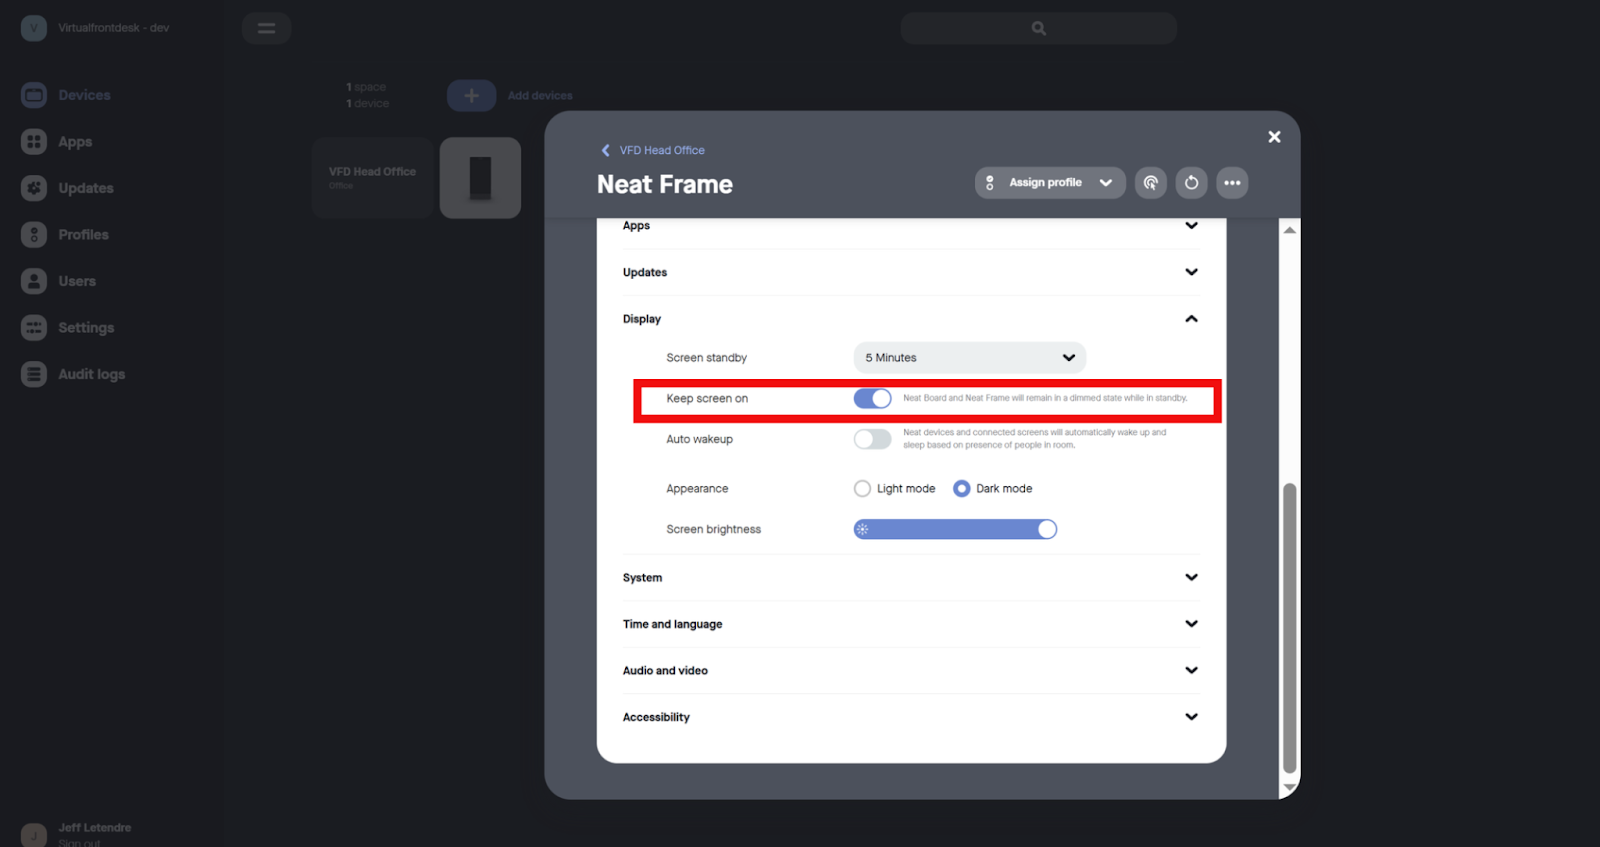
Step 8: Finalize kiosk and display settings
For the final setup steps:
- Go back to your Neat Pulse account
- Click the device picture
- Under Apps, toggle Kiosk mode on to remove the settings menu from the screen
- Under Display, toggle Keep screen on
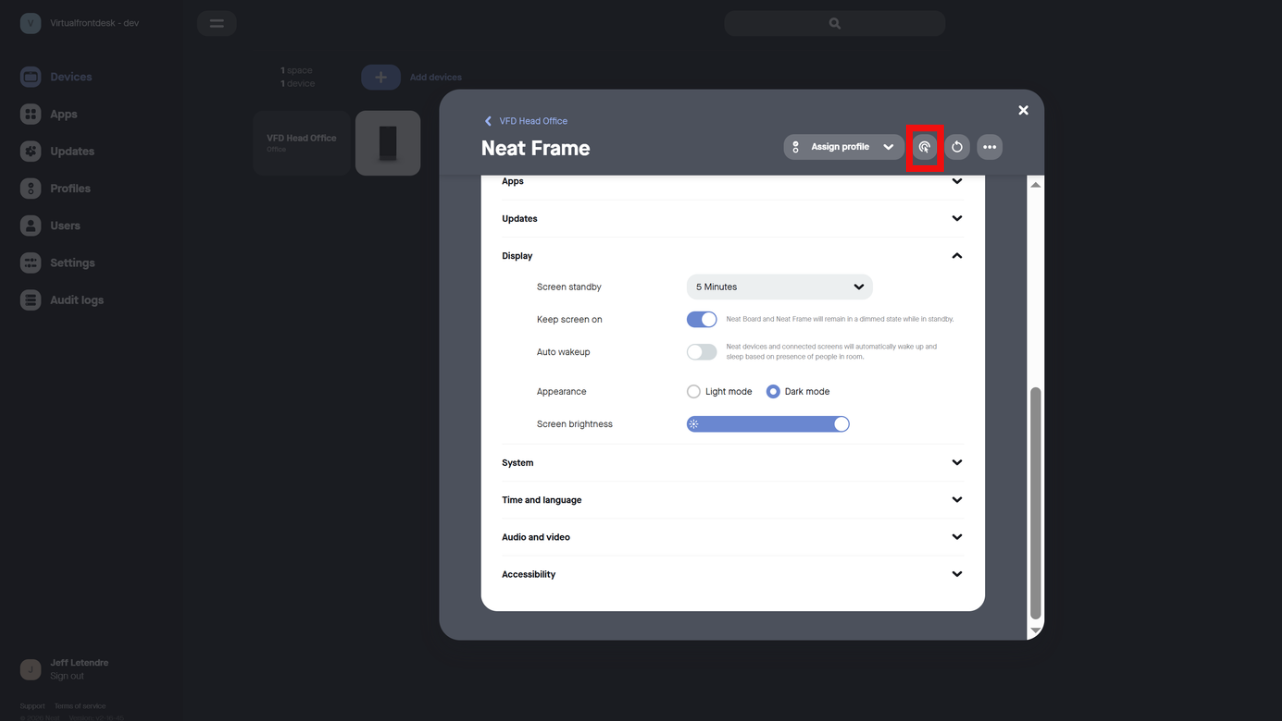
At this point, your Neat Frame is ready to run Virtual Front Desk as a dedicated reception device. The original article also notes that to adjust volume later, you may need to temporarily turn off Kiosk Mode, remotely access the device, and open system settings from the right side of the screen.
What this upgrade changes
Moving from a Microsoft Teams Displays-based front-desk setup to Virtual Front Desk on Neat Frame can help organizations shift toward a broader reception workflow. Instead of relying on a narrower calling-centered setup, teams can use Virtual Front Desk as the software layer for station actions, visitor flows, and branded reception experiences.
That makes this setup especially relevant for organizations that want:
- A dedicated reception device experience
- Support for branded front-desk stations
- A path to broader visitor and reception workflows
- A repeatable setup for multiple locations
Need help with the migration?
If you are replacing a Microsoft Teams Displays-based front-desk setup and want help planning the best device and rollout approach, contact the Virtual Front Desk team before deployment.


