OKTA integration SSO sign in
Signing in to Virtual Front Desk
Virtual Front Desk supports several sign-in methods:
- Email and password – standard credentials created during signup
- Microsoft SSO – sign in with your Microsoft work account (Entra ID)
- Google SSO – sign in with your Google Workspace account
- Okta – for organizations that require centralized identity management and an additional layer of security
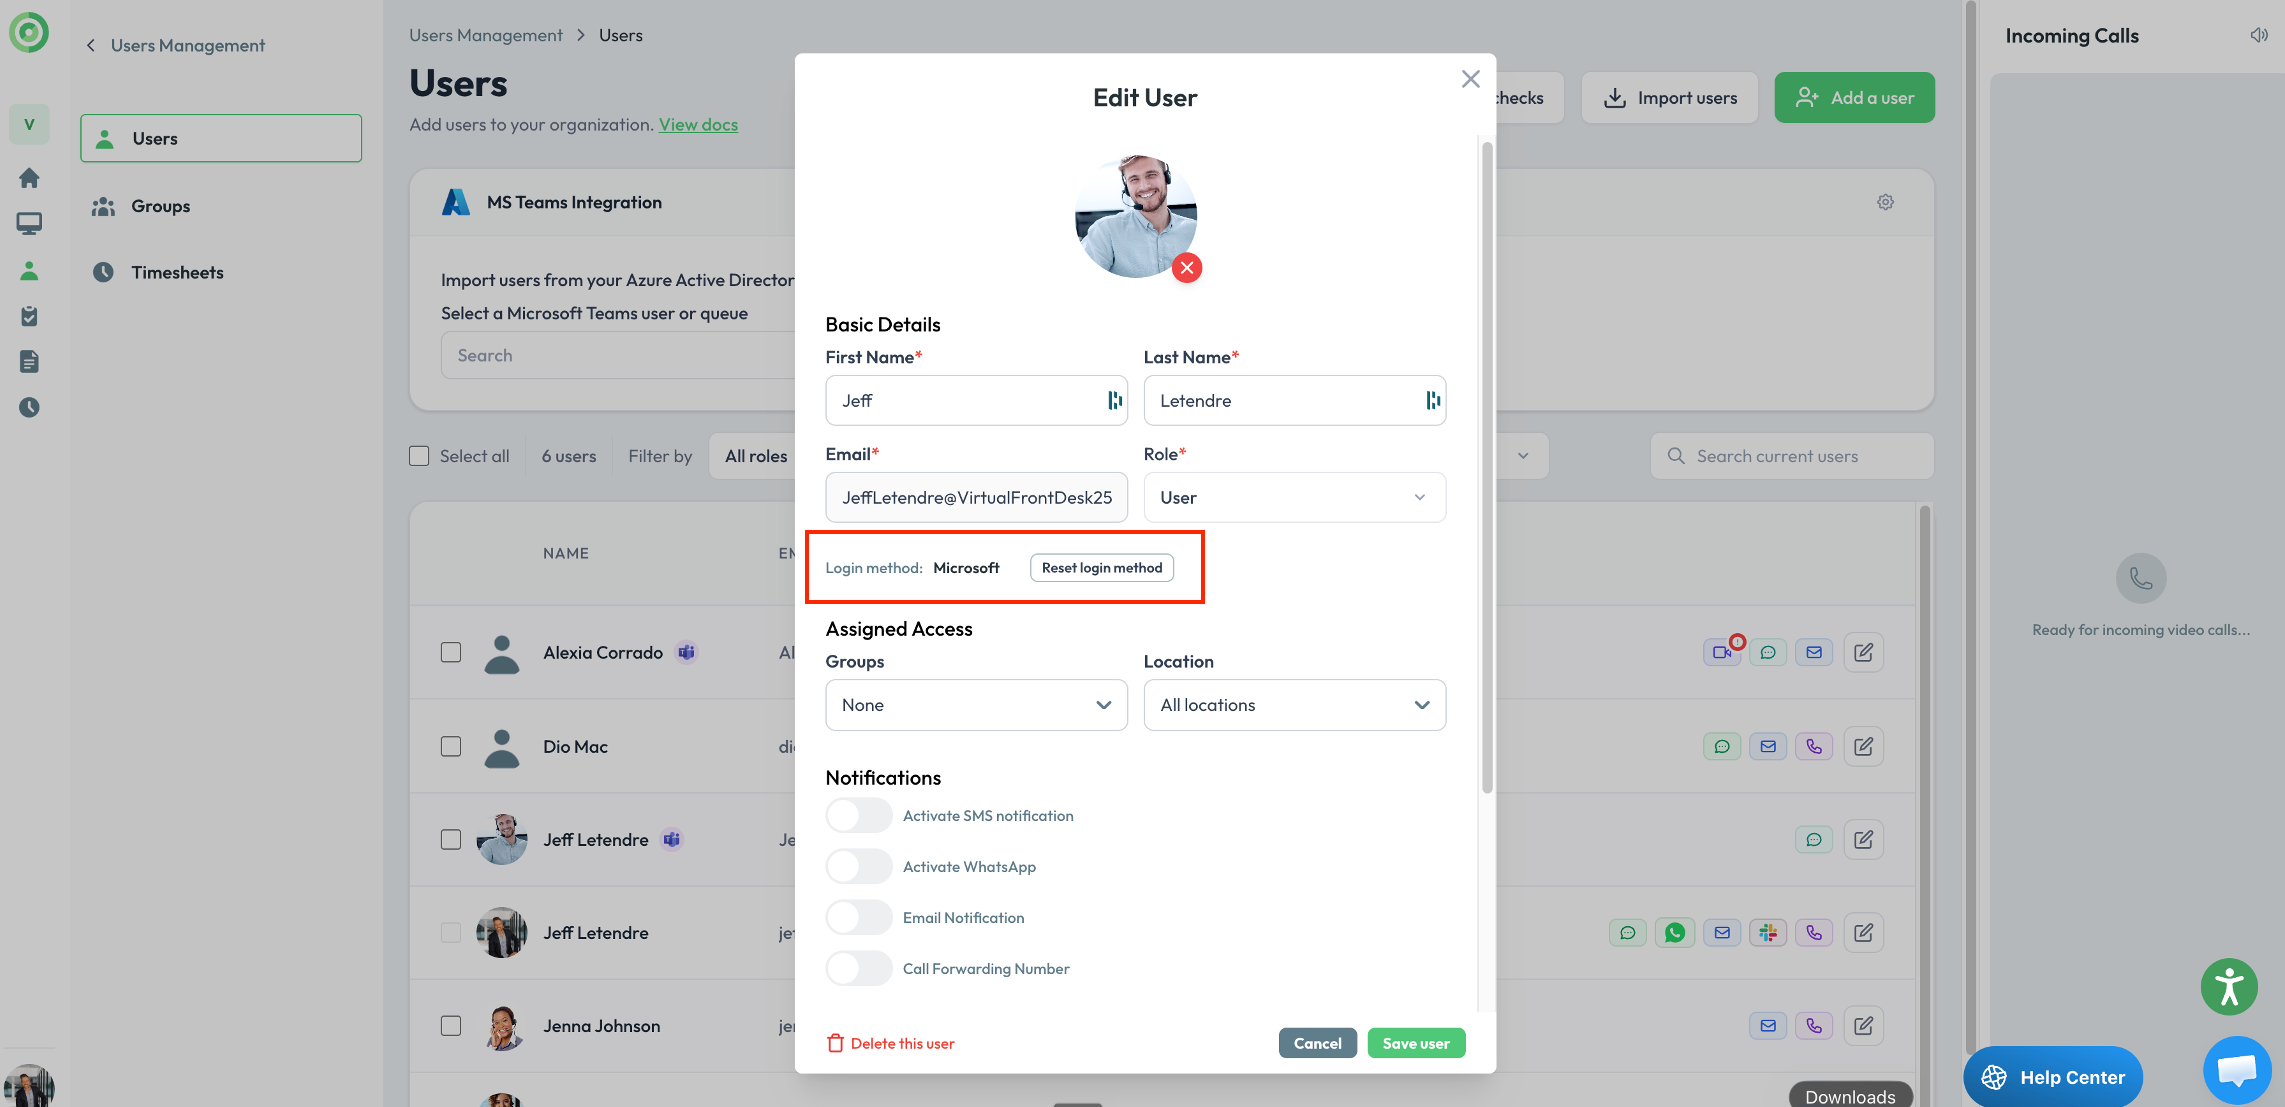
Please note: Each user can only have one active sign-in method at a time. To switch a user from one method (e.g., Google SSO) to another (e.g., Okta), an administrator must open the user's edit page and click Reset Login. Whichever sign-in method the user selects at their next login will then become their new permanent method.
This guide walks you through integrating Okta with Virtual Front Desk so your team can sign in using your organization's existing Okta credentials.
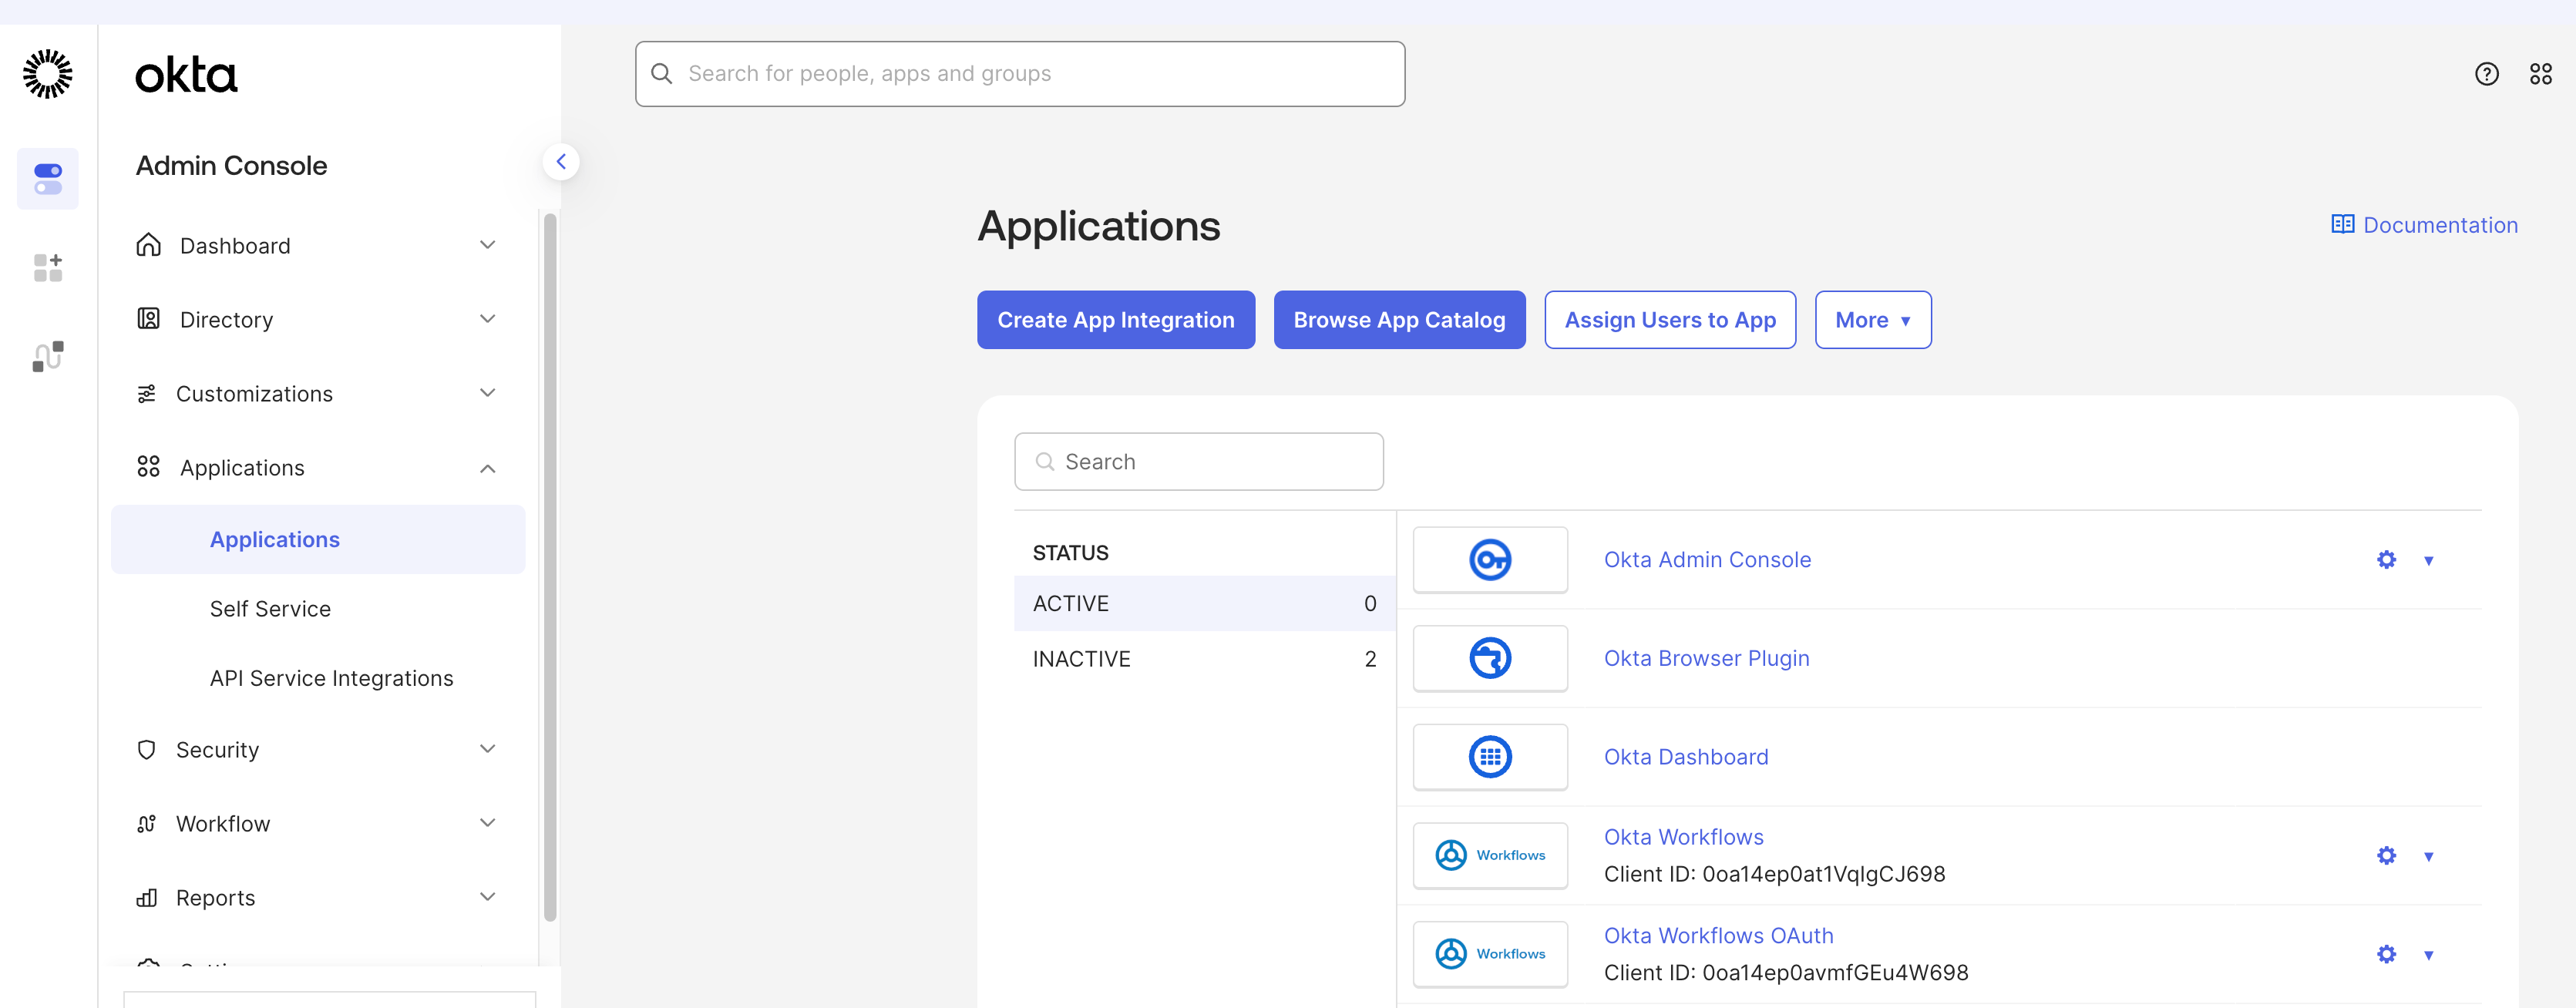
1. The first step is to create an App Integration from your OKTA admin console.
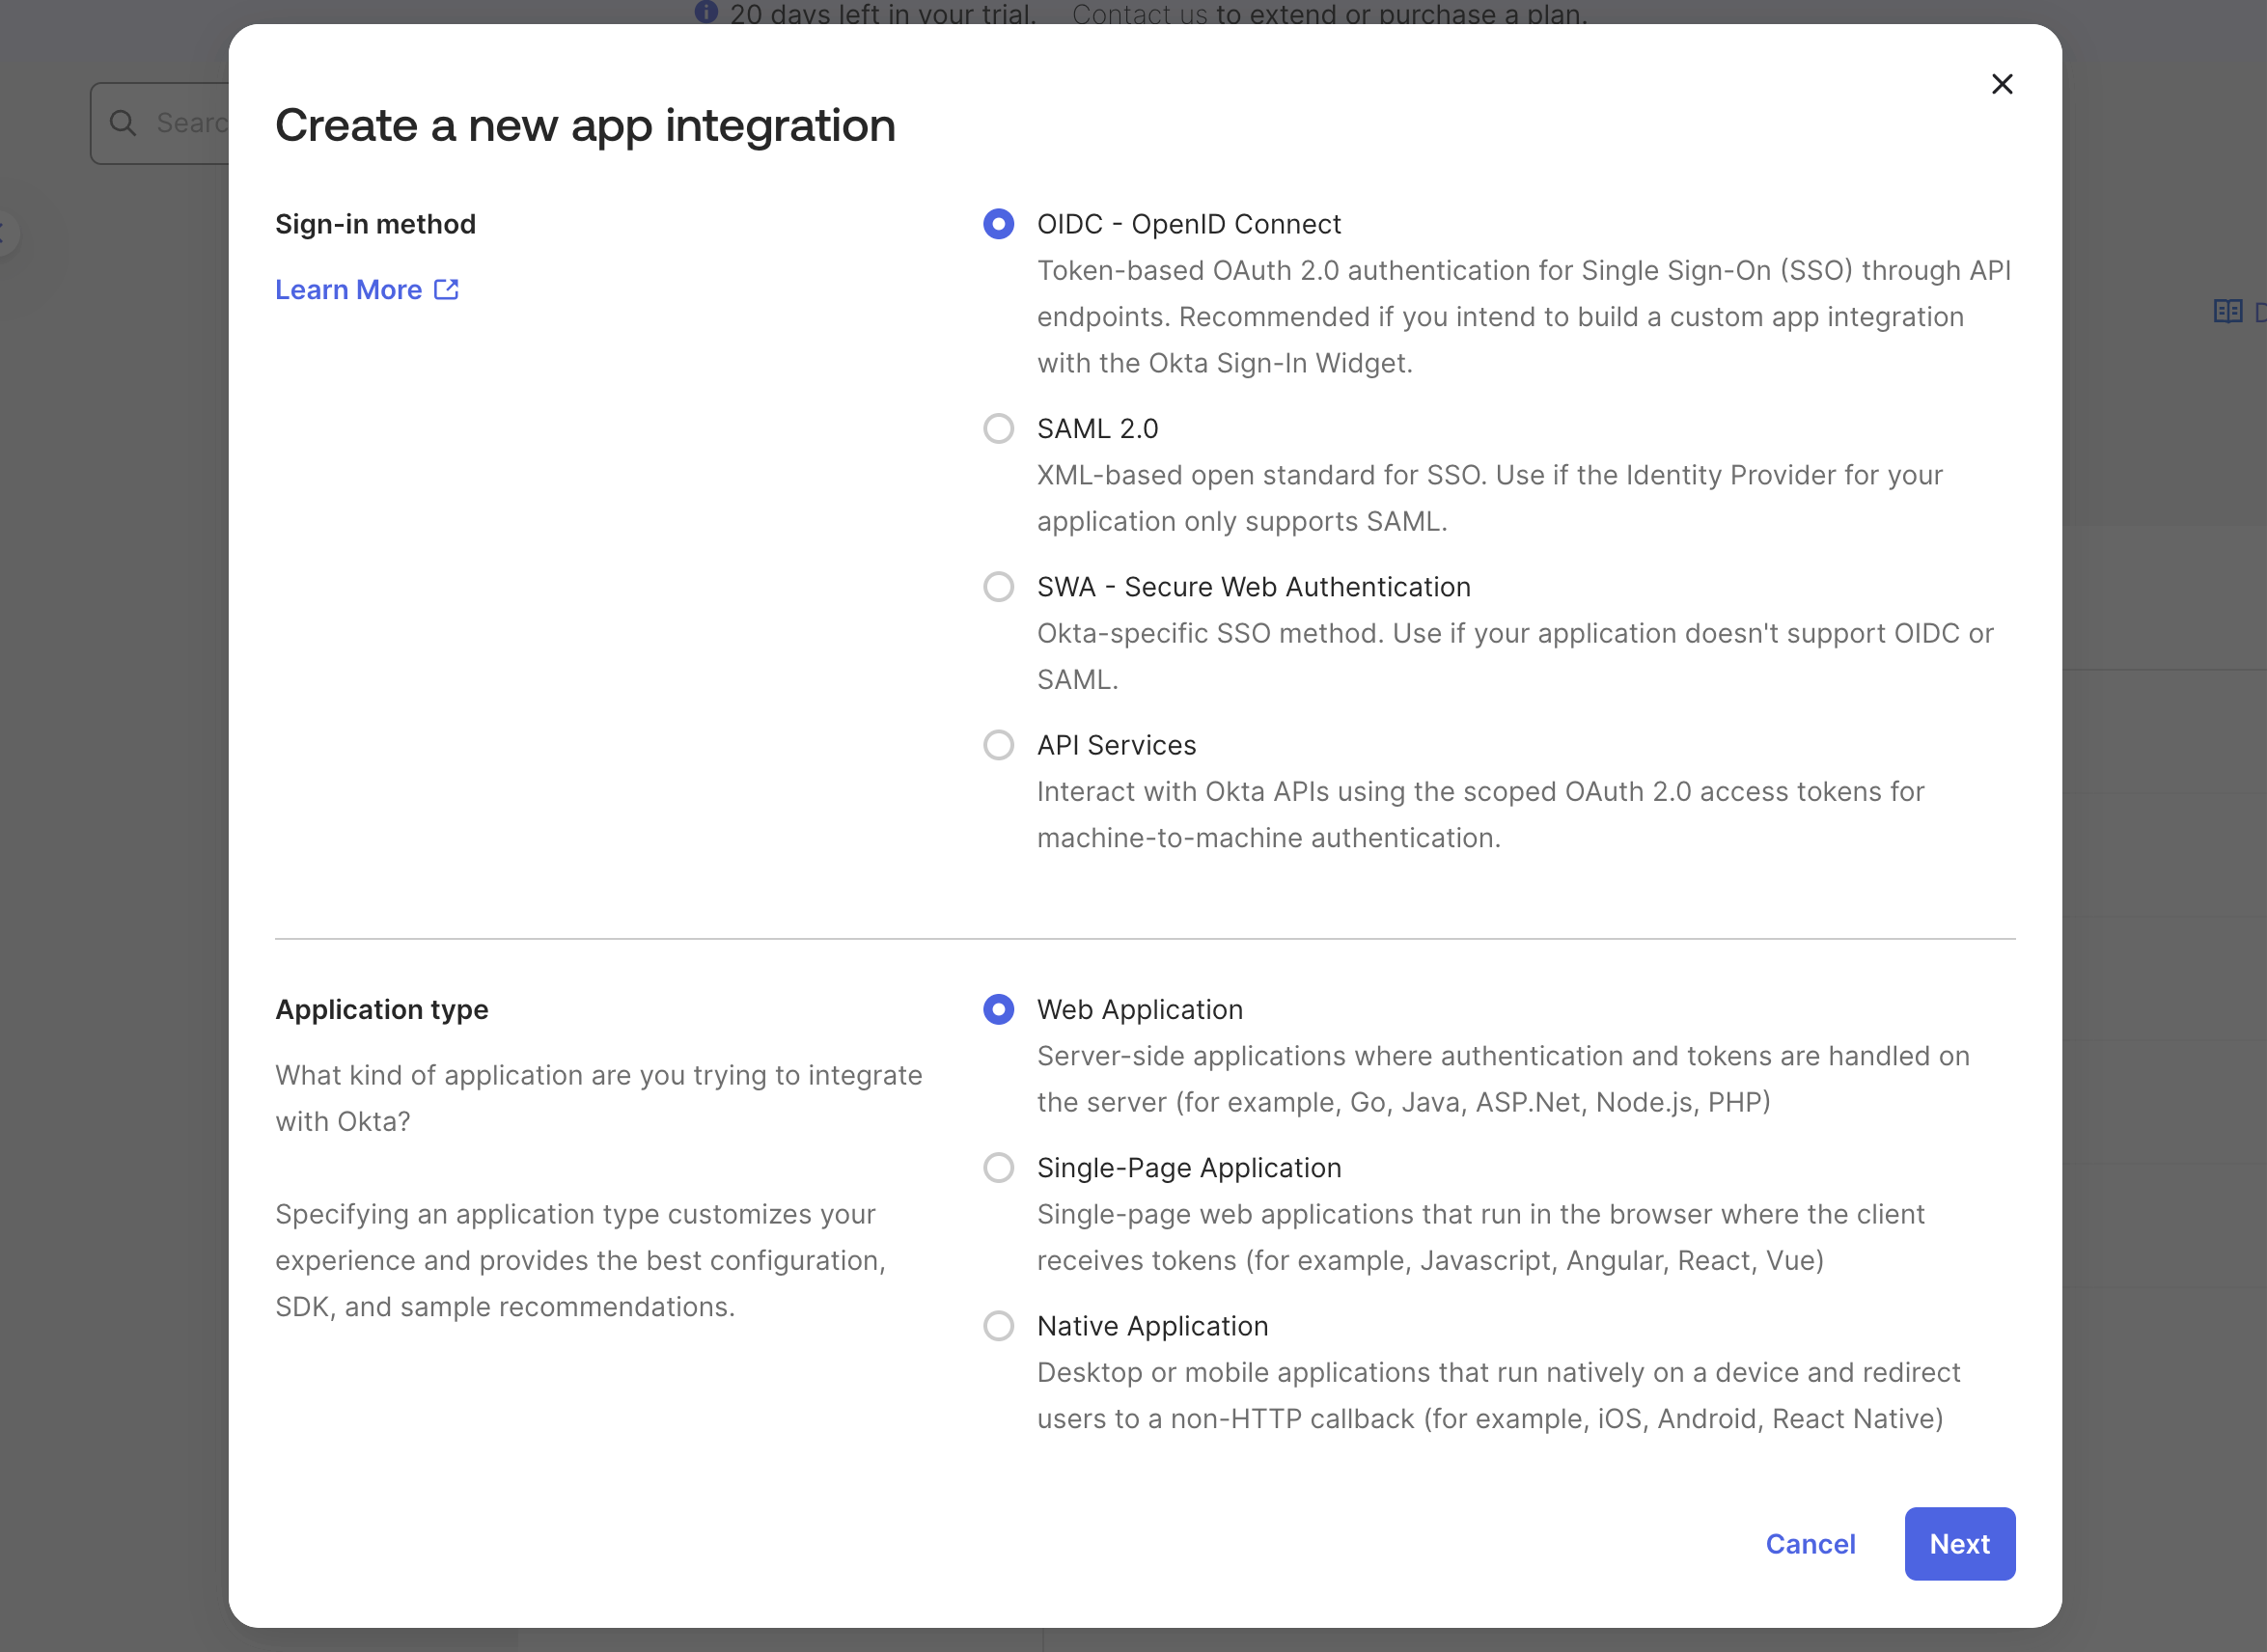
2. Select OIDC openID Connect, and Web Application.
3. Name the integration.
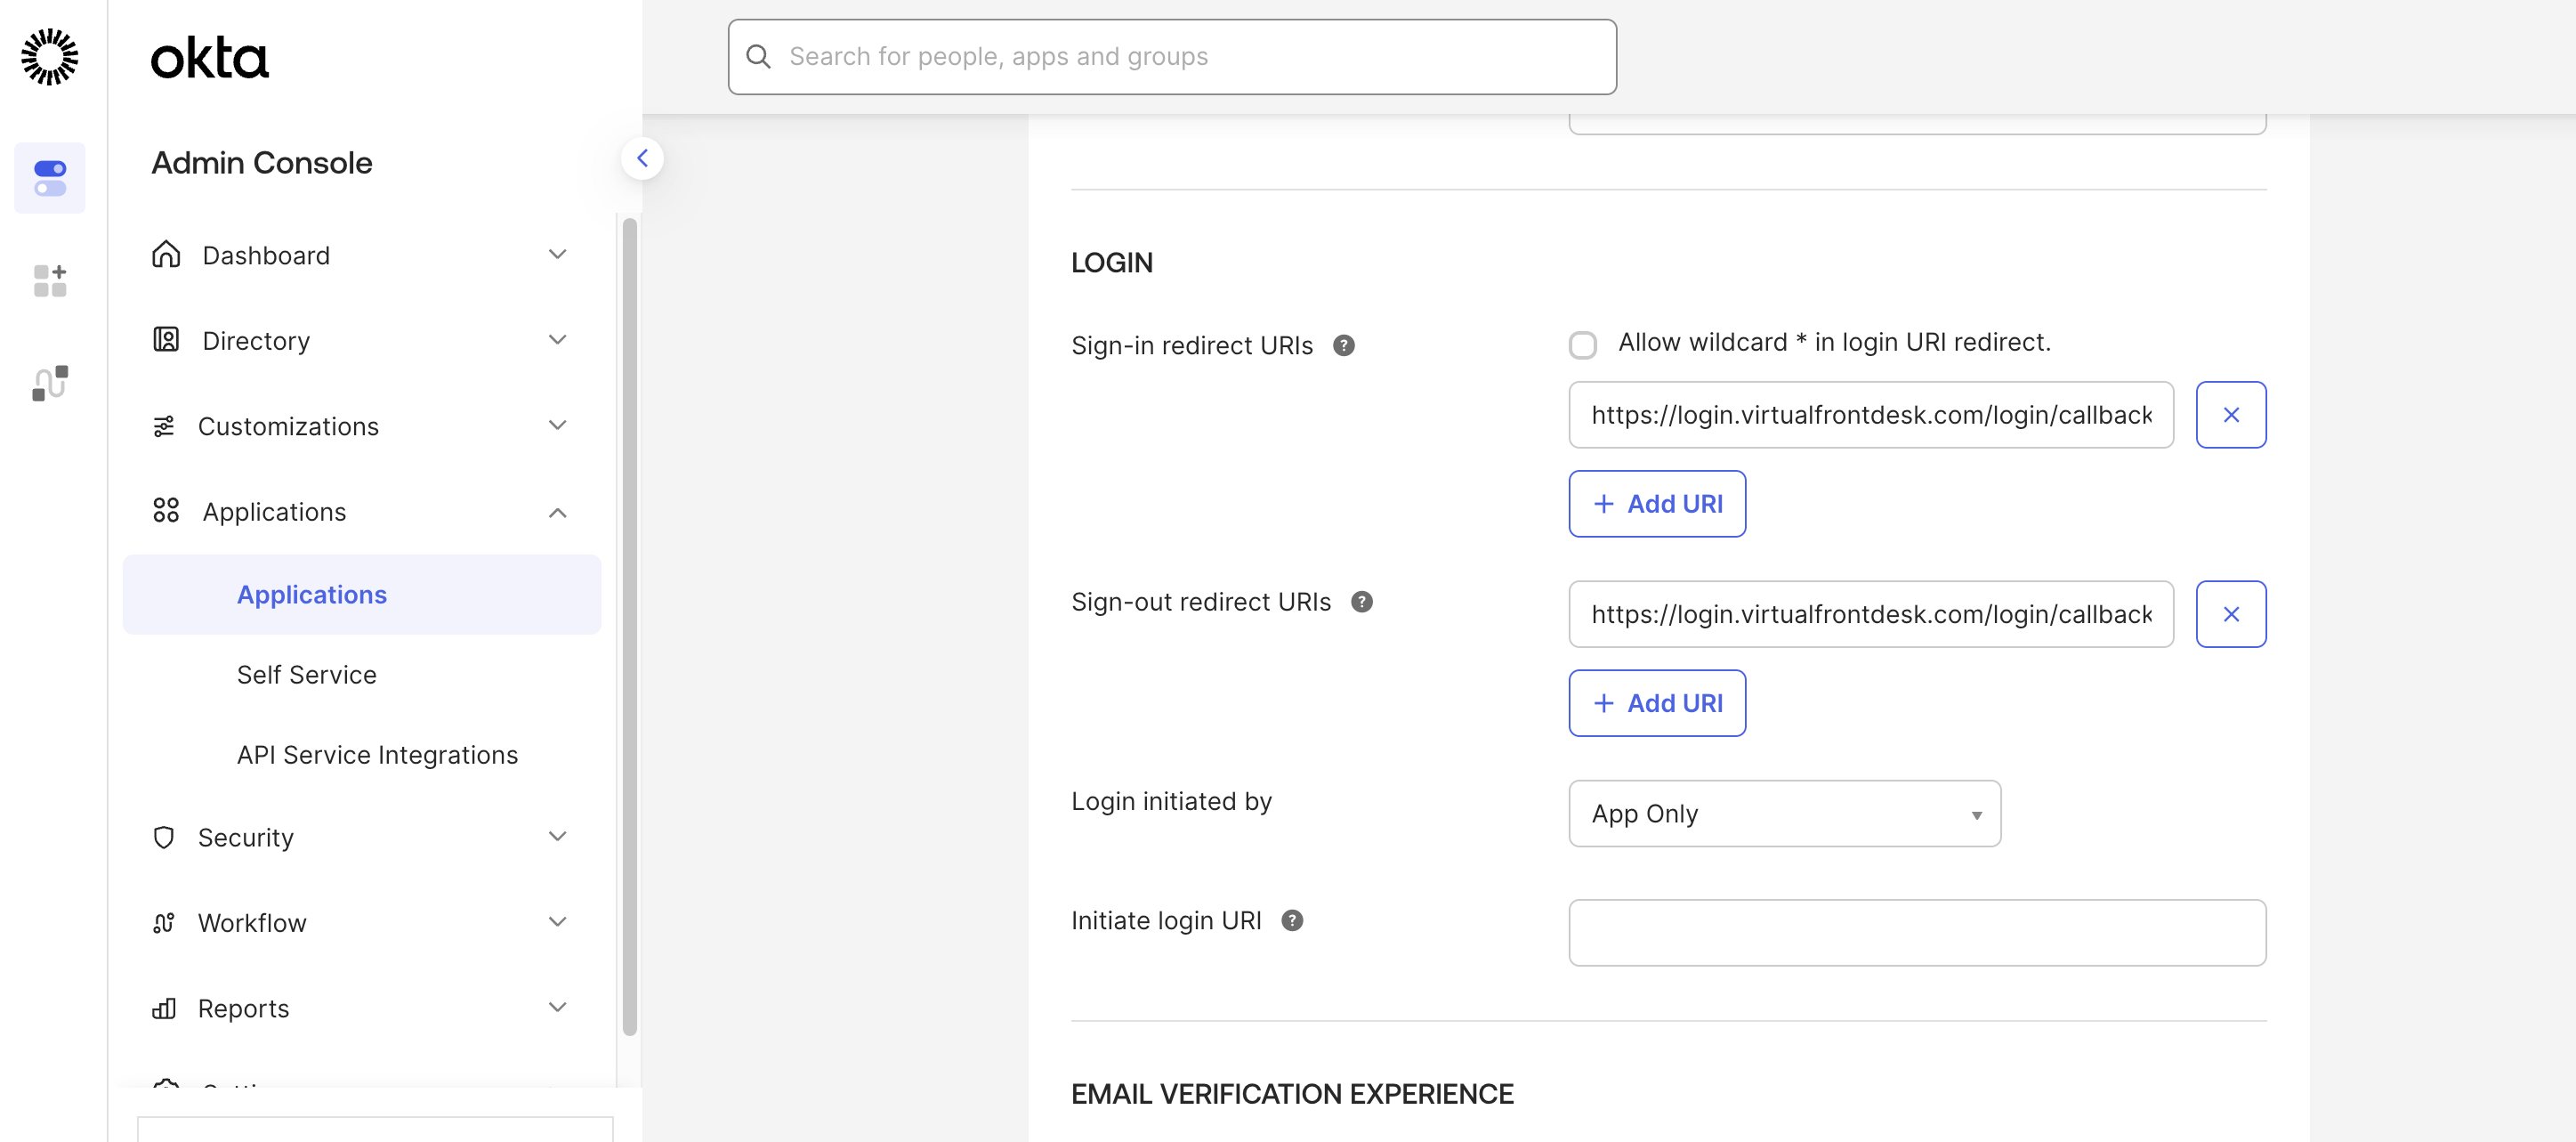
4. Enter as the Sign in and sign out redirect URLs according to your region:
https://login.virtualfrontdesk.com/login/callback for US
https://login.virtualfrontdesk.ca/login/callback for Canada
https://login.virtualfrontdesk.global/login/callback for Europe
https://login.virtualfrontdesk.asia/login/callback for Asia
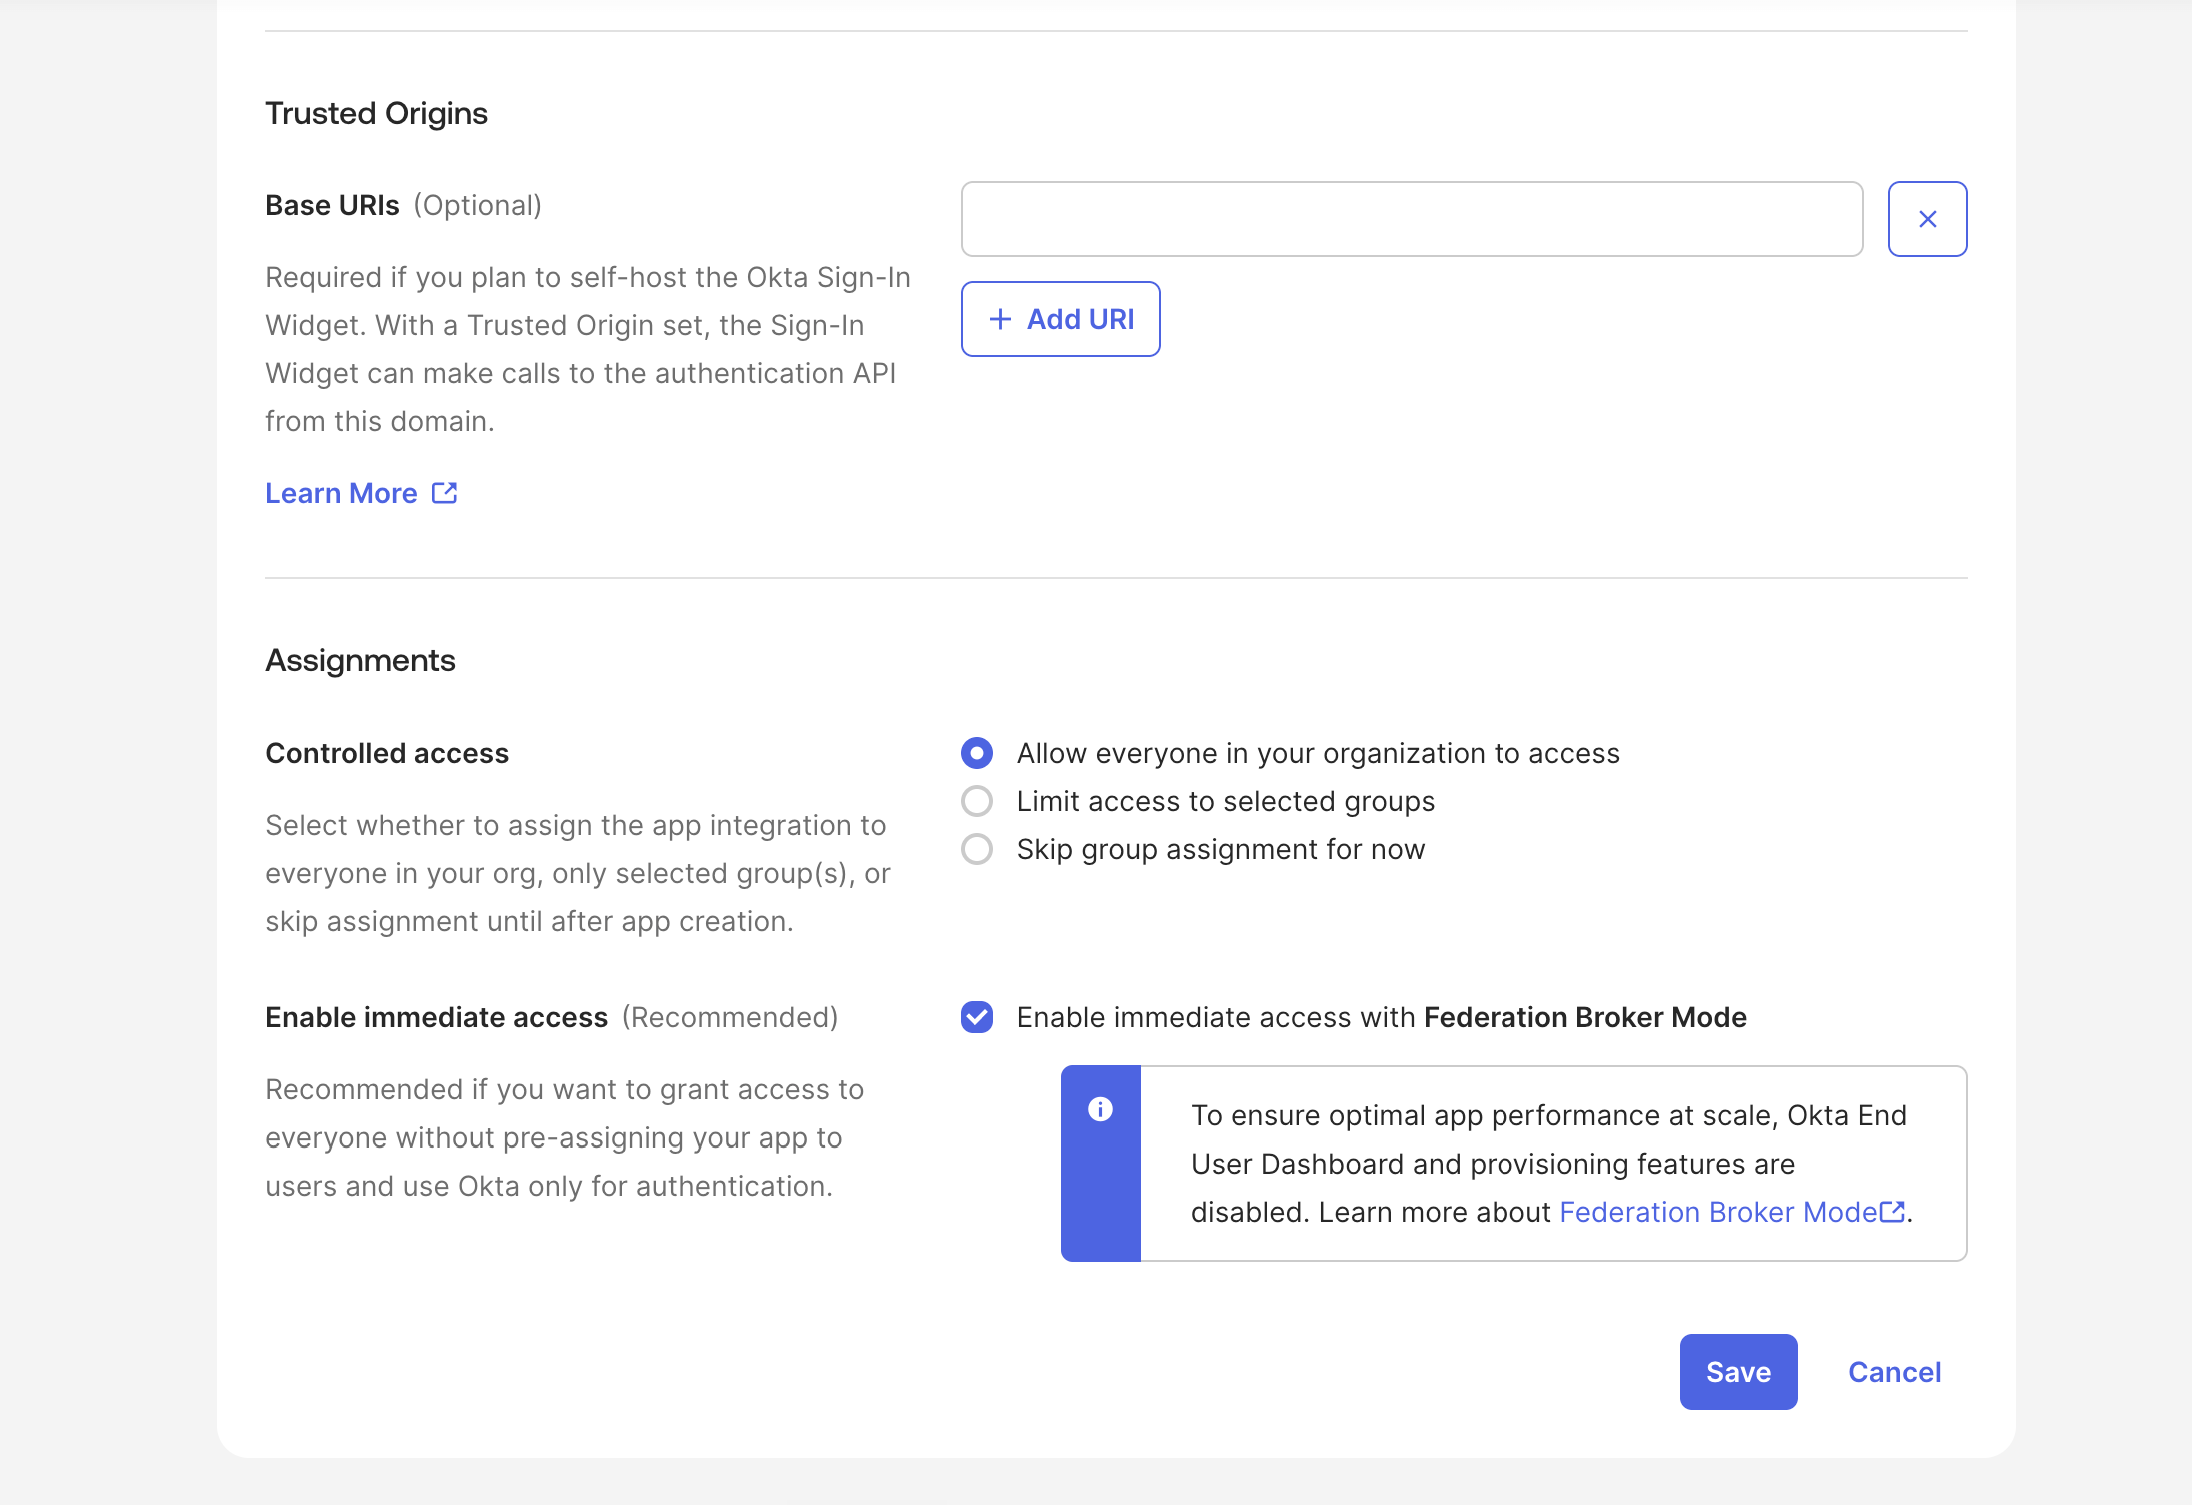
6. Assignements, select: Allow everyone in your organization to access and enable immediate access with federation broker mode.
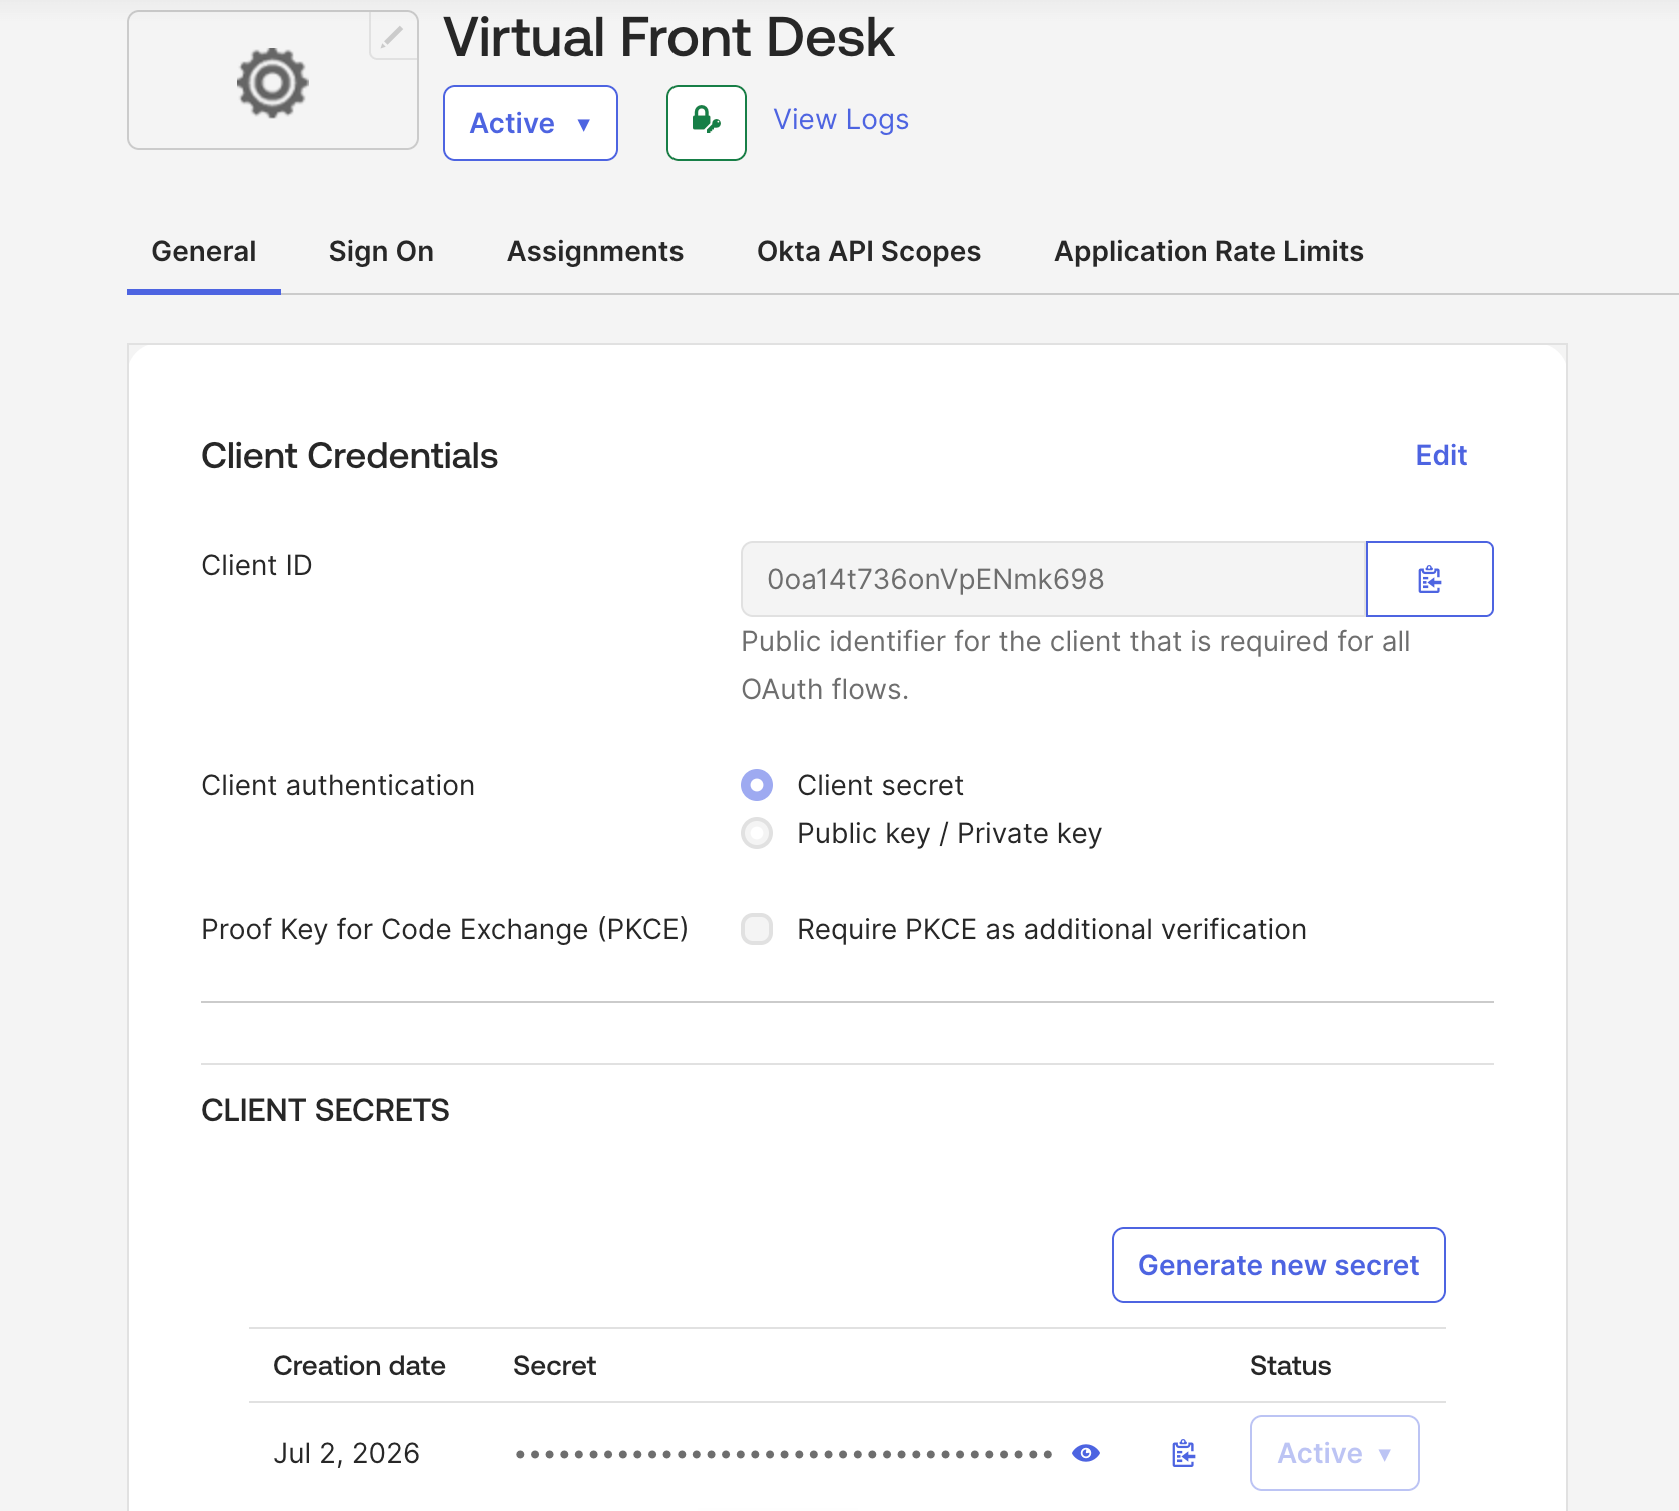
7. Copy and enter the client ID into the Virtual Front Desk dashboard in the OKTA integration section. Settings / integrations
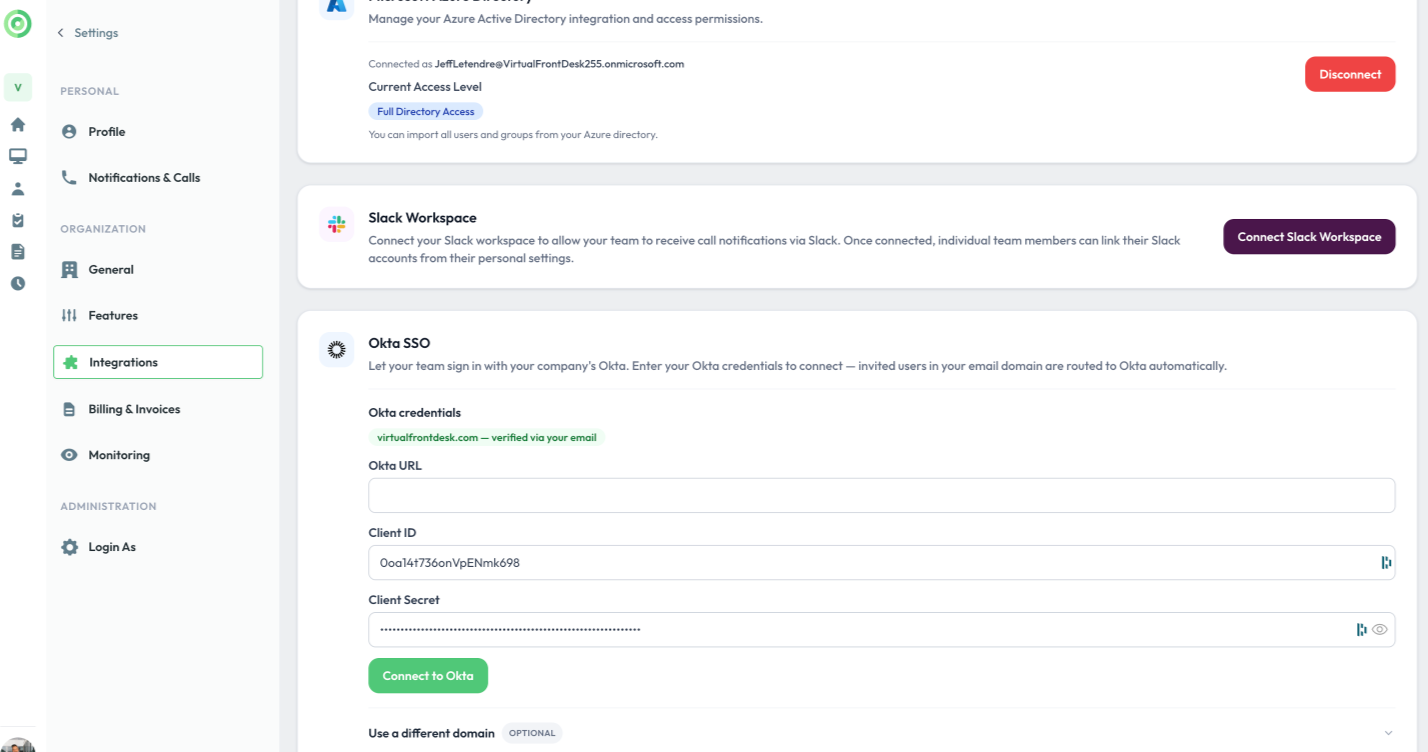
8. Enter your Okta URL. Look at the address bar. Your Okta URL is the base address, it typically looks like https://yourcompany.okta.com
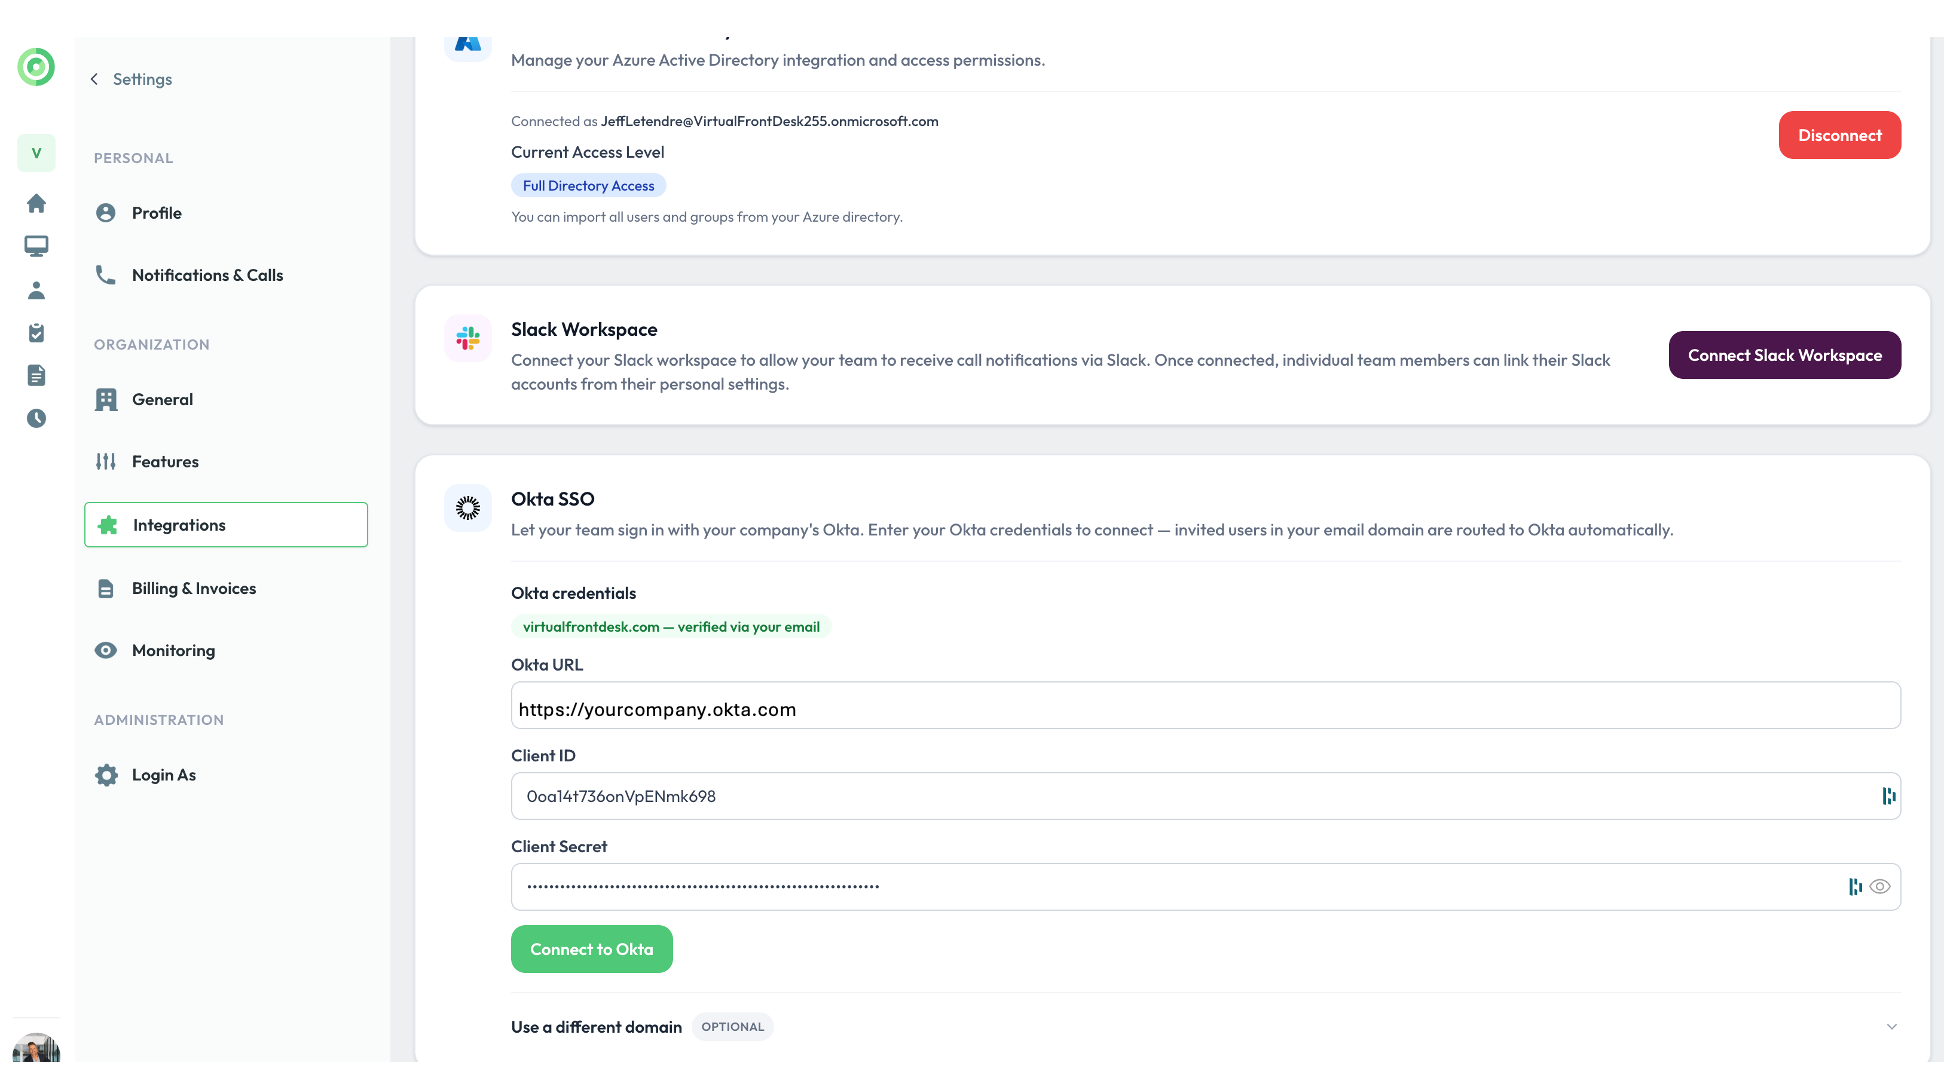
9. Connect to Okta
Your integration is done. Your users can now log in to Virtual Front desk with the Okta option.